Getting Started with LXC Containers on Proxmox VE
Using LXC containers on Proxmox VE is an efficient way to run multiple Linux environments on the same kernel, without the overhead of full virtual machines. This tutorial walks you step by step through creating your first LXC containers on Proxmox VE.
If you regularly need to run lightweight services that do not require a full virtual machine, then the LXC (Linux Container) is the right answer. Why? Because it delivers near-native performance.
There are three ways to run containers with Proxmox VE:
- Run an LXC container from a base Linux operating system image
- Run an LXC container from an OCI image
- Run a container through Docker via a virtual machine or a dedicated LXC container (this is also true with Podman)
The first two methods mentioned above are native, while the third one relies on Docker as an additional component.
You can also read my previous Proxmox VE tutorials:
- Getting started with Proxmox VE: the complete guide
- Proxmox VE: how to create a Windows 11 virtual machine?
- Proxmox VE: snapshot management
- Network configuration with Proxmox VE: the getting started guide
Table of Contents
Understanding LXC vs KVM architecture
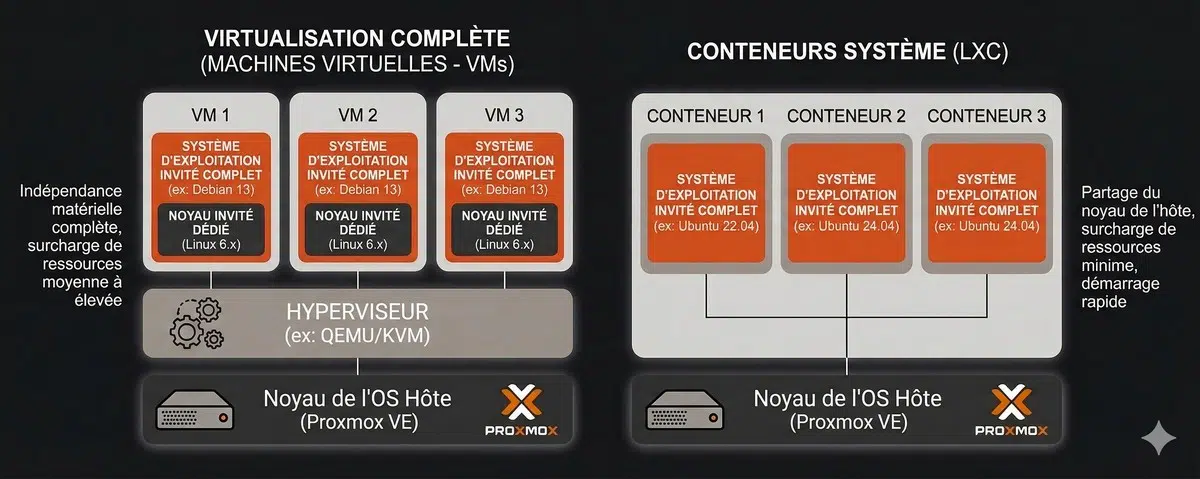
Before using Proxmox VE to create your first container, it is important to fully understand the Proxmox VE architecture. It is based on two technologies: KVM and LXC.
Unlike a KVM VM, which emulates hardware (motherboard, BIOS, disk) and loads its own kernel (a complete, independent kernel), an LXC container shares the hypervisor's kernel (Proxmox VE). This is a major difference between a virtual machine and a container.
Isolation, on the other hand, is provided by two Linux kernel mechanisms:
- Namespaces: they isolate groups of processes and resources from one another. The LXC container "thinks" it is alone on the machine.
- Cgroups (Control Groups): they limit and measure resource usage (CPU, RAM, I/O) to prevent one container from saturating the host.
Compared with virtual machines, containers have two major advantages: they start very quickly and their memory footprint is smaller (less RAM, less disk space). However, LXC containers are limited to running Linux distributions only (so no Windows).
Dependence on the host operating system kernel (Debian used by Proxmox VE) can be a constraint in some cases. In other words, some applications will not be able to run in an LXC container (this is even more true if you use an LXC to run Docker containers).
Finally, LXC is not a technology developed by Proxmox. You can create LXC containers on Linux without using Proxmox VE.
A bit of history : LXC has been used by Proxmox VE since version 4.0, whereas before that it relied on OpenVZ.
Proxmox VE - LXC Container vs Virtual Machine
Below is a comparison to help you clearly understand the main differences between an LXC container and a virtual machine in terms of features.
| Feature | LXC Container | Virtual Machine |
| Kernel | Shared (Host) | Independent |
| Supported OSes | Linux only | Windows, Linux, BSD... |
| Backup | ✅ Yes | ✅ Yes |
| Snapshot | ⚠️ Partial (not RAM) | ✅ Full |
| Live migration | ❌ No (unlike LXD, which should not be confused with LXC) | ✅ Yes |
| Firewall | ✅ Yes | ✅ Yes |
| Hot RAM and CPU changes | ✅ Yes | ✅ Hotplug (VM configuration and support from the guest OS) |
| Docker (nesting) | ⚠️ Possible ("Nesting" option) | ✅ Native |
| Security / Isolation | Average (namespace) | High (virtual hardware) |
Create your first LXC container on Proxmox VE
Managing LXC container templates
To create a container, you do not use a classic installation ISO image, but a Template. It is a pre-installed, ready-to-use archive of a distribution. Let's see how to import a first template.
- Log in to the Proxmox web interface.
- In the left tree view, select your storage (named
localby default). - Click on the "CT Templates" section.
- Click the "Templates" button in the toolbar.
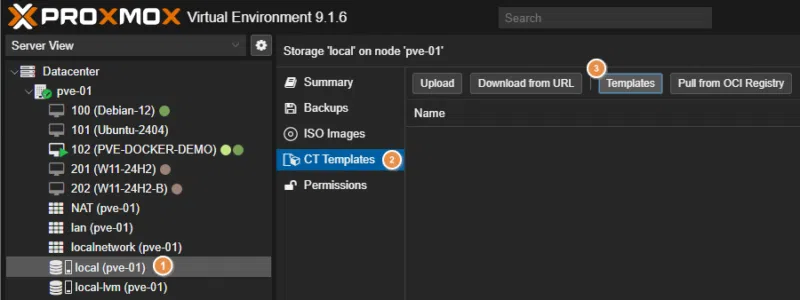
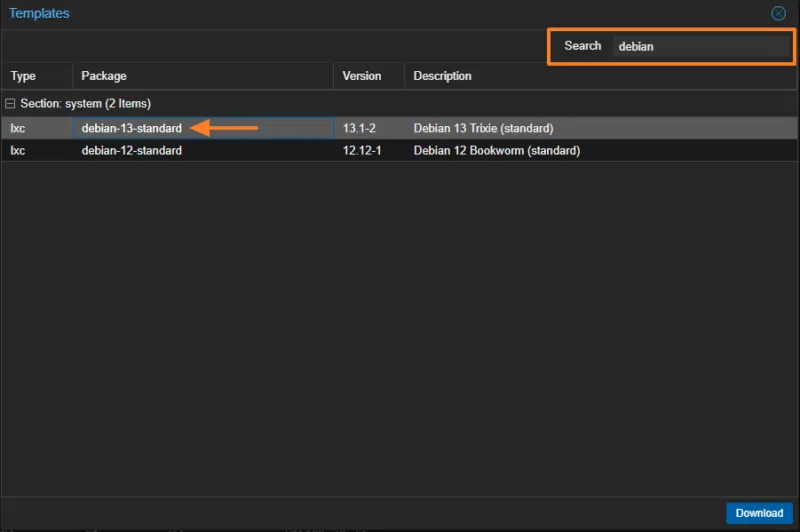
A list of official templates appears (Debian, Ubuntu, Alpine, CentOS, AlmaLinux, etc.). Search for the keyword debian to install the Debian 13 template named debian-13-standard. Select it and click the "Download" button.
I recommend Debian for one simple reason: the LXC container will share the same base as the Proxmox VE host, since Proxmox VE itself is based on Debian. And, I have to admit, I also really like this distribution.
The operation is relatively quick because the files are small (around one hundred megabytes for a Debian system without a graphical interface).

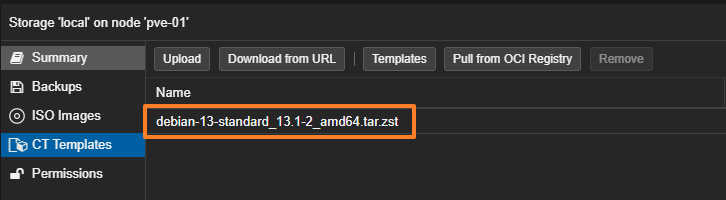
The container template has been downloaded. It is ready to use.
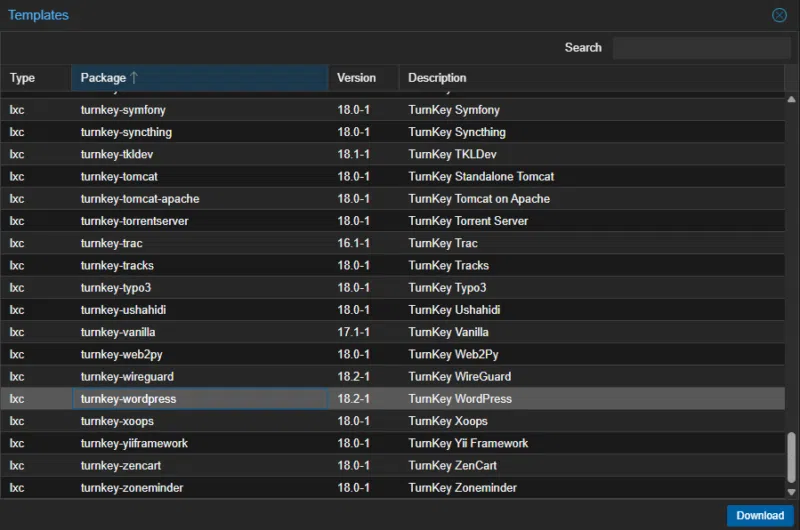
The list of templates available in Proxmox VE includes a set of Turnkey Linux templates. These are pre-configured images with ready-to-use applications, such as WordPress, Apache Tomcat, etc. There are dozens of ready-to-use application templates. This can be useful for quickly deploying an application for testing purposes.
Creating an LXC container
Once the template has been downloaded, we can move on to creating a first LXC container based on it. In the Proxmox VE interface, click the blue "Create CT" button located at the top right.

A step-by-step wizard similar to the one used to create a virtual machine appears on screen.
General tab
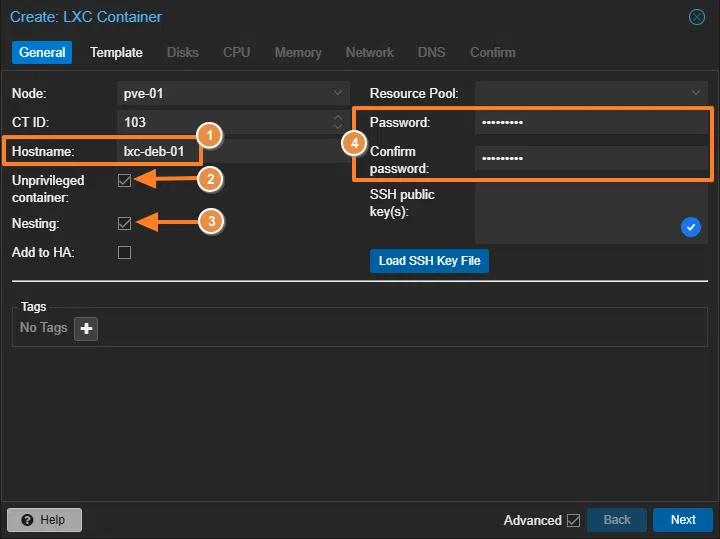
- Node: select your Proxmox server.
- CT ID: the unique identifier for this container; you can let Proxmox VE manage it.
- Hostname: the container name, but also the system name inside the container (for example:
lxc-deb-01). - Privileged vs Unprivileged: by default, the "Unprivileged container" box is checked. For security reasons, it is recommended to keep this option enabled. In an unprivileged container, the
rootuser inside the container is mapped to an unprivileged user on the host. This prevents the LXC container from affecting the host system (container escape). - Nesting : leave this option unchecked unless you want to run a container inside this container (via Docker, for example). However, it is also required for some systems, such as Debian 13 (because of Systemd), so here we must check the option, otherwise the container will be unusable.
- Password: define the root password for the future LXC container. You can also load a public SSH key for key-based authentication (recommended)
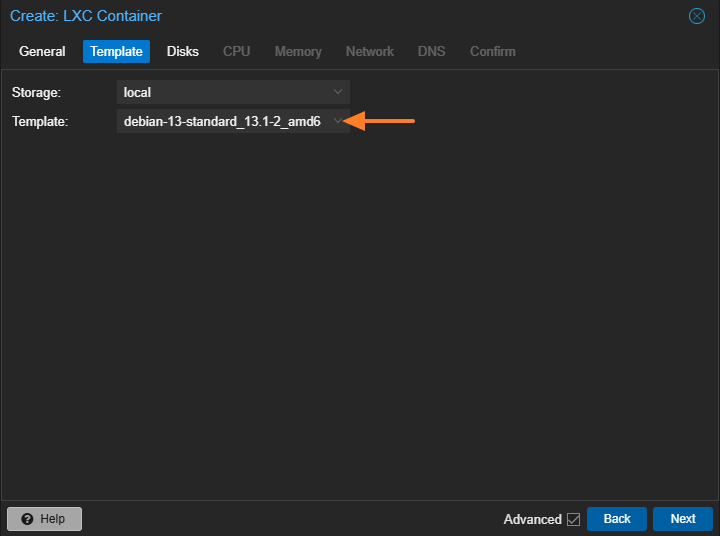
Template tab
Here, select the storage where you downloaded your template, then choose the Debian 13 image downloaded earlier.
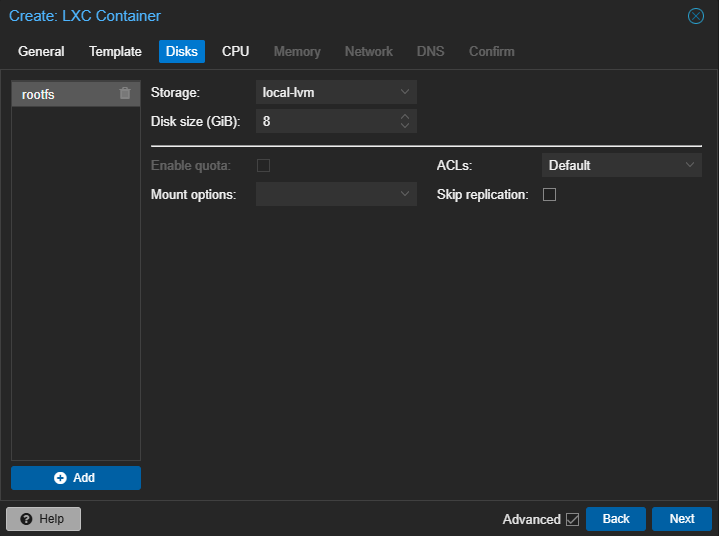
Disks tab
Set the size of the virtual disk. For a simple web service, 8 GB may be enough. Here, it all depends on your needs and on what the LXC container is intended for.
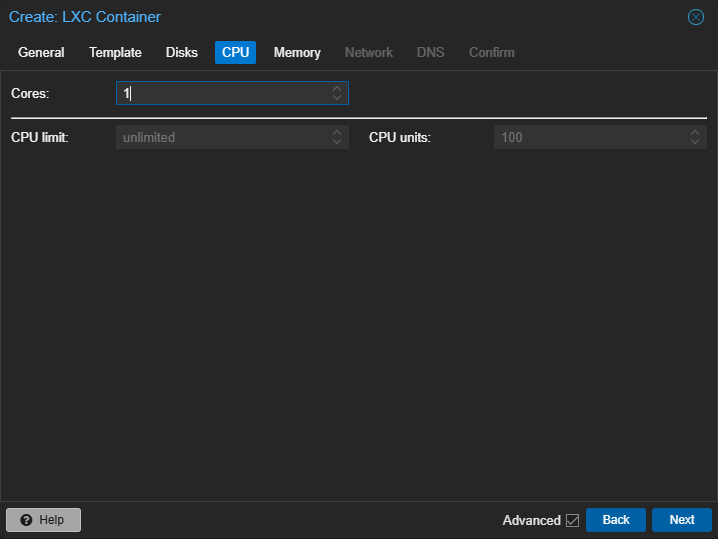
CPU tab
Specify the number of CPU cores allocated to this container. Adjust it later if needed, depending on the workload of the container.
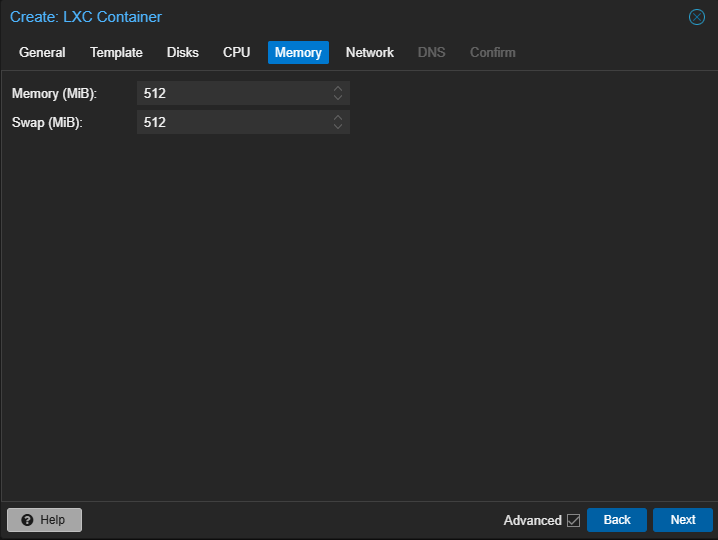
Memory tab
Set the RAM, for example 512 MB, and the swap. Unlike VMs, unused memory in the container remains available to the host. This is another advantage of LXC.
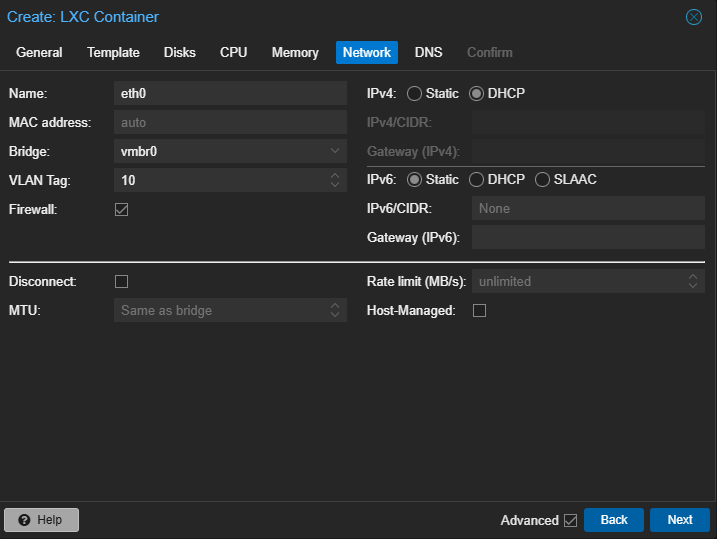
Network tab
This is where you define the network configuration for your container. In production, an IP address is often assigned. Otherwise, you can keep DHCP mode. Also make sure to select the correct network interface (Bridge) and, if needed, add a VLAN number.
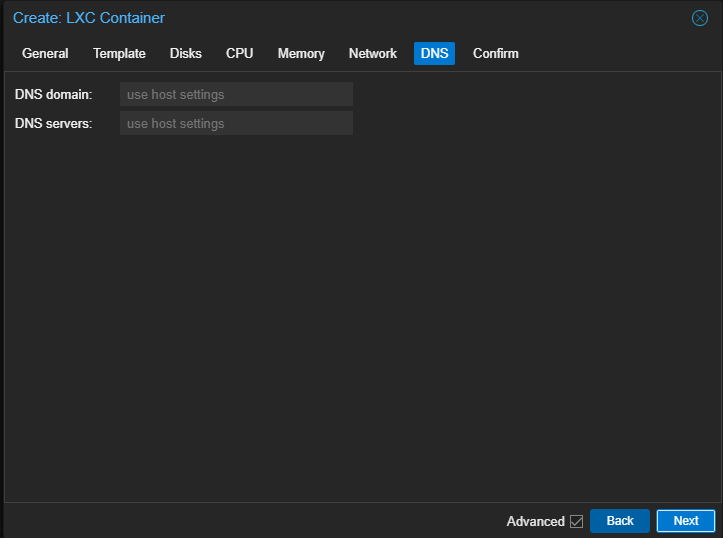
DNS tab
By default, the Proxmox server domain name and the same DNS server will be used. If needed, adjust these values here.
Start the container creation, then wait a moment.
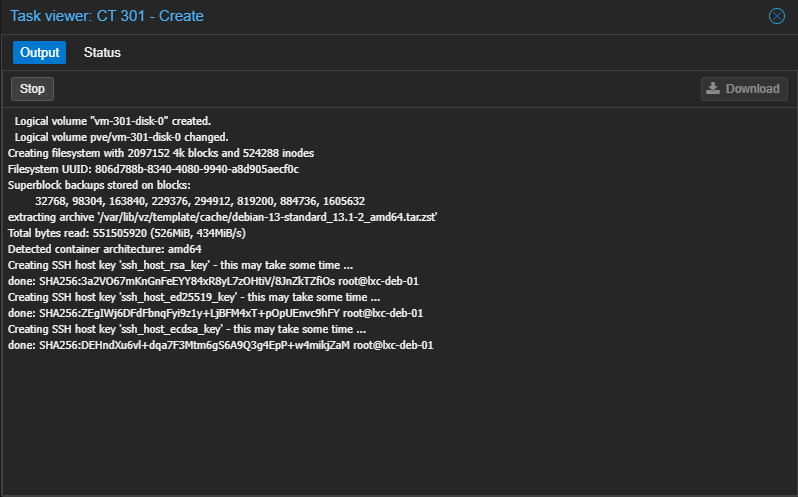
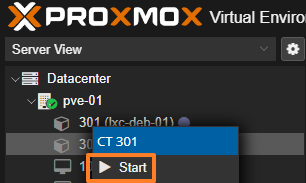
Once the LXC container is created, it appears in your host inventory. You will notice that containers have a different icon than virtual machines. To start the container, right-click its name, then click "Start".
Using the LXC container
To begin configuring this LXC container, use the same method as for administering a virtual machine: the console. SSH access is also an option, although you will first need to retrieve the container's IP address if it is using DHCP (via the "Network" tab or the command line).
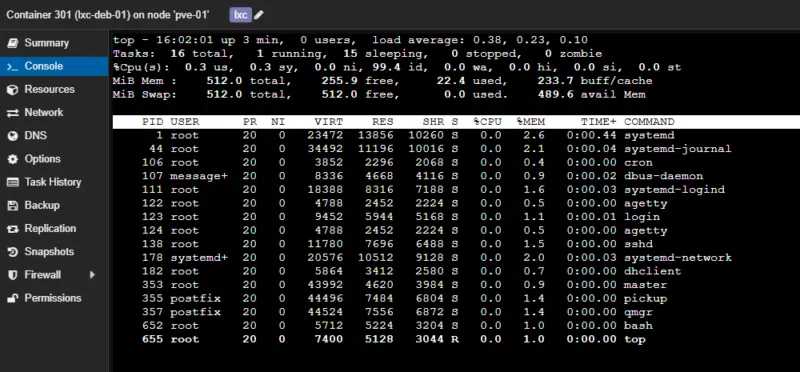
Through the console, log in using the password specified during container setup.
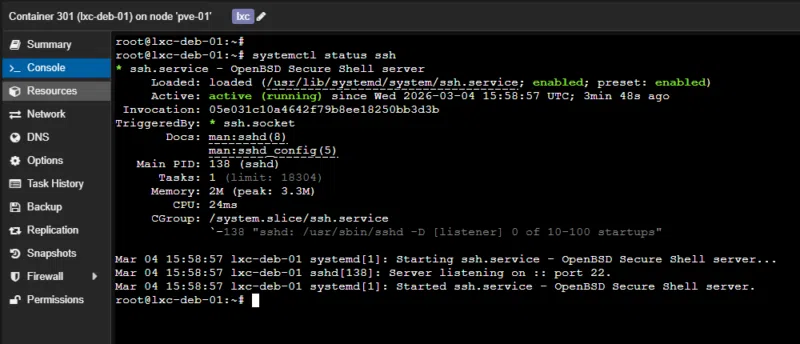
The SSH service is already installed and configured by default.
The rest is up to you!
Managing LXC containers with pct
For managing Proxmox VE containers, you can use a command-line tool: Proxmox Container Toolkit. It is available through the pct command, and it runs directly on the Proxmox VE host (not inside the container).
Let's take a look at a few commands.
Managing LXC templates
The pct command includes the options needed to browse templates and download one. We could have downloaded the previous template using this command.
# Update the template list
pveam update

# List Debian templates
pveam available --section system | grep debian

# Download the template (use autocomplete to help with the name)
pveam download local debian-13-standard_13.1-2_amd64.tar.zst
You can then list the container templates available on the storage space, meaning those already downloaded.
pveam list local

NAME                                                         SIZE
local:vztmpl/debian-13-standard_13.1-2_amd64.tar.zst         123.70MB
Listing containers
pct list

# Example output

VMID       Status     Lock         Name
301        running                 lxc-deb-01
302        running                 lxc-wordpress
303        running                 lxc-oci-uptime-kuma
Display an LXC container configuration
pct config <ID>

# Example
pct config 301
arch: amd64
cores: 1
features: nesting=0
hostname: lxc-deb-01
memory: 1024
net0: name=eth0,bridge=vmbr0,firewall=1,hwaddr=BC:24:11:CF:75:CF,ip=dhcp,tag=10,type=veth
ostype: debian
rootfs: local-lvm:vm-301-disk-0,size=8G
swap: 512
tags: lxc
unprivileged: 1
Note that you can also view the configuration by reading the raw file directly (the file name matches the container ID):
cat /etc/pve/lxc/301.confEnter a container from the host (without SSH)
This is a very practical feature if you have lost the root password, cut off the container's network access, or simply want to avoid exposing a remote access service.
pct enter 301

# Example

root@pve-01:~# pct enter 301
root@lxc-deb-01:~#
root@lxc-deb-01:~# hostname
lxc-deb-01
In the command above, replace 301 with your container ID.
Gracefully stop a container
pct shutdown <ID>
pct shutdown 301
Start an LXC container
pct start <ID>
pct start 301
Modify the container configuration
You can modify a container's configuration on the fly, that is, while the container is running. If you do it through the pct command, here is the syntax to follow:
pct set <id> [OPTIONS]If you want to add RAM without using the graphical interface, you can use this method. Here is how to move to 1,024 MB of RAM on the container with ID 301.
pct set 301 -memory 1024You could also decide to configure, for example, the "Nesting" option directly from the command line.
pct set 301 --features nesting=1Create an LXC container from the command line
The pct command can also create an LXC container on your Proxmox host. This makes it possible to automate container creation! As a result, this all-in-one command accepts a huge number of arguments when it comes to creating and configuring a container in a single step.
The command below creates and configures a container on the same principle as what was done through the graphical interface. That is, a container with the Debian 13 image, 512 MB of RAM, 1 CPU core, 8 GB of disk space, and a network interface in DHCP with a VLAN 10 tag. In addition, the --start 1 option starts the container automatically as soon as it is ready.
pct create 304 local:vztmpl/debian-13-standard_13.1-2_amd64.tar.zst \
  --hostname lxc-deb-04 \
  --cores 1 \
  --memory 512 \
  --swap 512 \
  --rootfs local-lvm:8 \
  --net0 name=eth0,bridge=vmbr0,firewall=1,ip=dhcp,tag=10,type=veth \
  --unprivileged 1 \
  --features nesting=0 \
  --tags lxc \
  --password <MOT_DE_PASSE> \
  --start 1
After running this command, a container named lxc-deb-04 with ID 304 has been created.
Example output:
Creating filesystem with 2097152 4k blocks and 524288 inodes
Filesystem UUID: 17312070-d712-442d-9317-d0d98d72f201
Superblock backups stored on blocks:
        32768, 98304, 163840, 229376, 294912, 819200, 884736, 1605632
extracting archive '/var/lib/vz/template/cache/debian-13-standard_13.1-2_amd64.tar.zst'
Total bytes read: 551505920 (526MiB, 430MiB/s)
Detected container architecture: amd64
Creating SSH host key 'ssh_host_rsa_key' - this may take some time ...
done: SHA256:BLCIFdoaZ9M2aD8ammlmpvK8vI9c1GsvB5mPUPMUyD4 root@lxc-deb-04
Creating SSH host key 'ssh_host_ed25519_key' - this may take some time ...
done: SHA256:Ivil+To1toVQMFRBFywn+mmdsM1A/6Sg7q2CDD6u2M8 root@lxc-deb-04
Creating SSH host key 'ssh_host_ecdsa_key' - this may take some time ...
done: SHA256:MF9qEM33I+yRINHylGAumllD2i2Jdui+LHYPwgygyLU root@lxc-deb-04
WARN: Systemd 257 detected. You may need to enable nesting.
WARN: Systemd 257 detected. You may need to enable nesting.
Task finished with 2 warning(s)!
Task finished with 1 warning(s)!
In the output of this command, this line is interesting: WARN: Systemd 257 detected. You may need to enable nesting.. It suggests that this container needs nesting mode to function, especially because Systemd needs to be able to use the namespaces feature. This warning is related to Debian 13 (and its Systemd version), as I mentioned earlier. Nesting mode must be enabled in the container.
As a reminder, you can edit the container configuration from the command line:
pct set 304 --features nesting=1Thanks to a Bash script, especially with a for loop and a few variables, you could create a script to automate the creation of a set of containers.
Delete an LXC container
To delete an LXC container directly from the Terminal, you must stop it and then remove it. Be careful, though: this action is irreversible. This command deletes the container, its configuration, and its disk.
pct stop <ID> && pct destroy <ID> --purge

# Example :
pct stop 304 && pct destroy 304 --purge
  Logical volume "vm-304-disk-0" successfully removed.
purging CT 304 from related configurations..
Advanced storage management: bind mounts
If you want to share a folder from the Proxmox host directly into the LXC container, that is possible. This is called a Bind Mount. Common use cases include:
- Access your personal
homedirectory in the container guest system, - Access the contents of a USB device in the container guest system,
- Access the data from an NFS share mounted on the host in the container guest system.
To configure this, you have two options: edit the container configuration file (for example: /etc/pve/lxc/301.conf) or use the pct command.
Although this practice is technically possible, it has a security impact.
With an Unprivileged container, you will run into permission issues. To fix this, you need to switch the container to Privileged or adjust permissions with an ID mapping... One method is detailed on this GitHub and, as you will see, it involves creating groups on the Docker host, then adjusting the configuration in the LXC container, all without switching the container to Privileged.
If the folder only needs to be accessible in read-only mode inside the container, this constraint does not exist.
Imagine that you have a data repository on the Proxmox host in /var/lib/vz/partage and that you want your container to be able to read these files.
Connect to your Proxmox server (the host) via SSH and create a folder with a test file:
mkdir -p /var/lib/vz/partage
echo "Ceci est un fichier de démo pour IT-Connect" > /var/lib/vz/partage/demo.txt
You then need to configure the mount point.
We will use the pct set command to add this mount point to the container configuration. We use the -ro 1 option (Read-Only) to ensure the container cannot delete or modify host data (read-only).
Run this command on the host (replace 301 with your container ID):
pct set 301 -mp0 /var/lib/vz/partage,mp=/mnt/partage_pve,ro=1To explain this command:
mp0: defines the first mount point (Mount Point 0)./var/lib/vz/partage: the source path on the Proxmox host.mp=/mnt/partage_pve: the destination path inside the container.ro=1: enables read-only mode.
Restart the container to apply the changes, then connect inside it:
pct reboot 301
pct enter 301
cat /mnt/partage_pve/demo.txt

# Result :

root@pve-01:~# pct enter 301
root@lxc-deb-01:~# cat /mnt/partage_pve/demo.txt
Ceci est un fichier de démo pour IT-Connect
You should see the content of the file created on the Proxmox host!
Note: if you need your container to write to this folder, the configuration will become more complex! As explained earlier, you will either need to switch your container to "Privileged" mode (less secure) or configure ID mapping (user mapping) to match the container user's permissions with those of the host folder. Prefer read-only mounts or the use of dedicated storage volumes directly on the containers.
Backing up and restoring LXC containers
Data protection should never be neglected, and that is also true for containers. The good news: Proxmox VE includes a backup tool for LXC.
The backup engine used is vzdump. There are three main modes for containers:
| Mode | Workflow | Service interruption |
| Stop | Full container shutdown ➔ Backup ➔ Restart. | Long (for as long as the copy takes!) |
| Suspend | 1st rsync (live) ➔ Suspend ➔ 2nd rsync (incremental) ➔ Resume. | Minimal (the time needed to copy the differences) |
| Snapshot | Suspend ➔ Storage snapshot ➔ Immediate resume ➔ Background archiving. | Very low (almost imperceptible) |
The "Stop" mode is very useful for critical services where data consistency must be perfect (an application that may be sensitive to that).
To complete this table, here are two important points to consider (which also echo the concept mentioned earlier):
- Bind mounts are excluded: Proxmox never backs up the contents of folders mounted from the host (the famous Bind Mounts). You must handle their backup separately on the host side.
- Volume exclusion: if you use Snapshot mode, all container volumes must support snapshots. If you have a specific disk that does not support them, you must exclude it from the backup by setting an option on the mount point:
backup=no.
To perform a backup, you have two options: a manual, immediate backup directly from the "Backup" section of the container to back up, or a scheduled backup via a job created in the Datacenter "Backup" section.
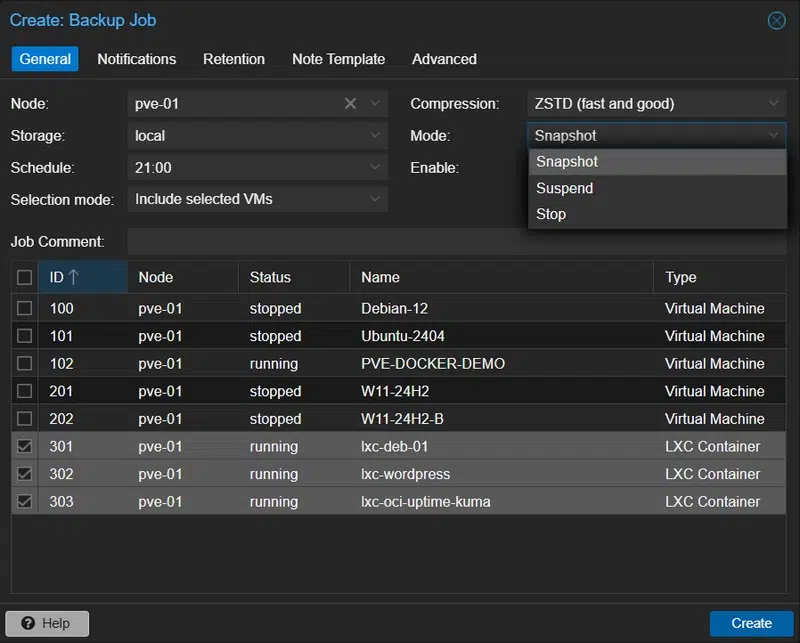
To schedule an automatic backup:
- Go to Datacenter > Backup.
- Create a new job.
- Select the time, the destination storage, and the containers concerned.
- Select the backup mode (refer to the table above).
- Validate the job creation.
A full article on Proxmox VE's native backup feature will be published soon.
Conclusion
By following this guide, you should now be able to create your first LXC containers on a Proxmox VE hypervisor! To go further, check out the dedicated article on using OCI images with LXC containers:
As a reminder, although containers are isolated, they share the same kernel as the physical host. Here are some rules to follow to limit the security impact:
- Privileges: use "Unprivileged" containers whenever possible.
- Nesting: enable the "Nesting" option only if necessary,
- SSH: if you allow SSH inside the container, forbid root login with a password and prefer SSH keys, exactly as you would on a VM or a physical server.