Proxmox VE Helper-Scripts: The Bash Script Collection That Speeds Up Deployment
Proxmox VE Helper-Scripts: behind this name lies a collection of more than 500 ready-to-use Bash scripts. They are designed to simplify Proxmox VE administration and application deployment through LXC containers or virtual machines.
Using these scripts makes task automation much easier, especially for rapid application deployment. This is particularly useful when you need to spin up a development environment quickly: a single command is enough to deploy an application. In fact, each service has its own Bash script designed for Proxmox that deploys an instance with the service up and running.
If you'd like to learn more, watch the video below or continue reading this article.
Also read:
- Proxmox VE: Getting Started with LXC Containers
- Proxmox VE: Run OCI (Docker) Images Natively in LXC
- Proxmox VE: How to Create Docker Containers
Table of Contents
What Are Proxmox VE Helper-Scripts?
Proxmox VE Helper-Scripts are a collection of shell scripts (developed in Bash) designed to interact directly with the Proxmox command-line interface. Their main purpose is to automate the lifecycle of LXC (Linux Containers) containers and virtual machines (VMs).
Instead of manually downloading a Linux distribution template, creating the container, configuring network interfaces, allocating storage space, and then updating the system before installing an application, the script handles all of those operations. The concept is very popular: more than 500 scripts are available, and they have been used more than 2 million times.
These scripts, listed on the community-scripts.org website and on GitHub, are organized into categories: Docker, networking, authentication, security, backup, and more. These are the official sources for this project: make sure you do not end up on another page when searching for them.
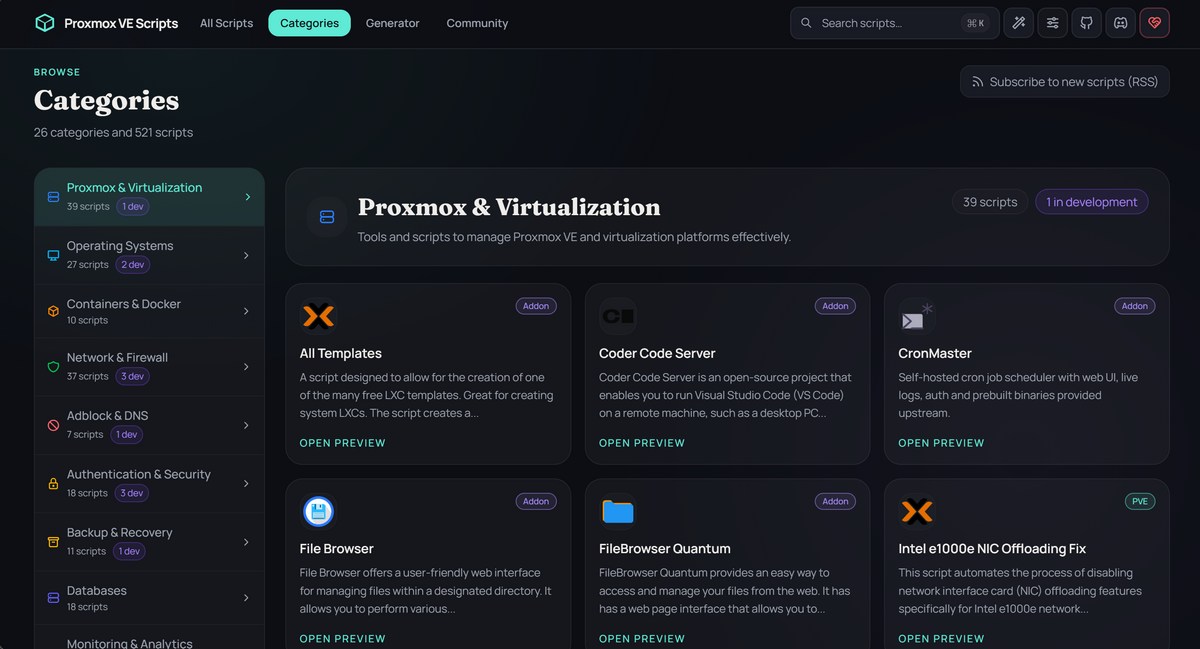
By browsing these categories, you'll find scripts to:
- Configure and maintain Proxmox VE,
- Deploy an application in an LXC container,
- Deploy an operating system (OPNsense, for example) or an application in a virtual machine.
Using a Helper-Script
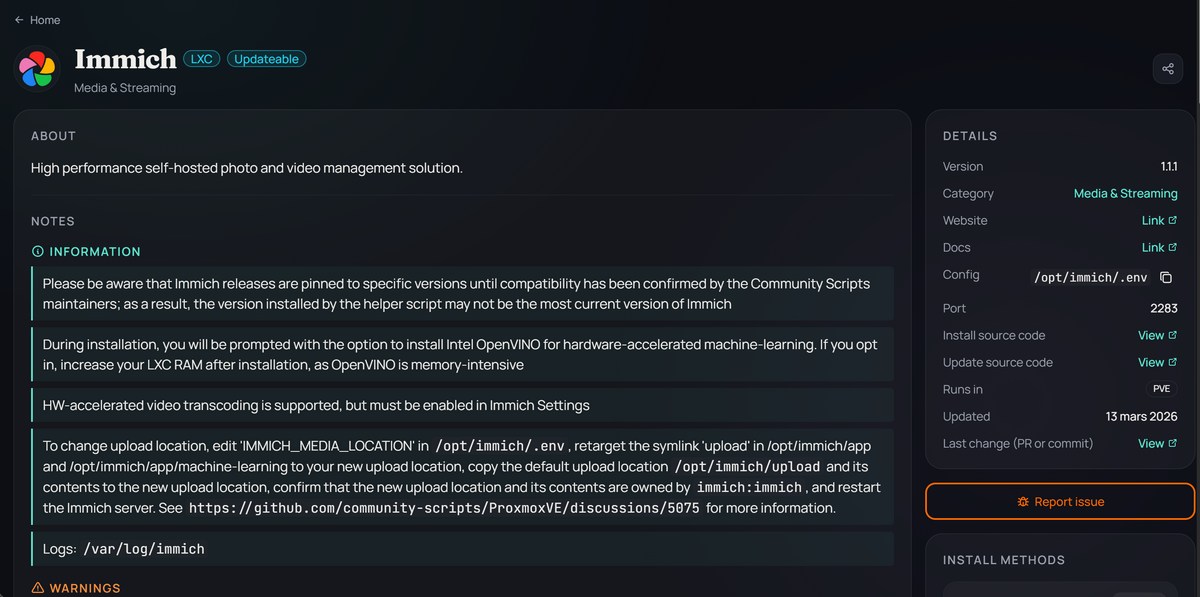
When you click on an application or service, you'll get access to the description, the command line used to launch the installation or task, and additional information to help you learn more. Each time, I recommend reading the "NOTES" section, as it provides details about the associated Helper-Script and any special considerations. In addition, the section on the right called "DETAILS" is valuable because it indicates:
- The deployed version of the service,
- A link to the solution's website and documentation,
- The configuration file and port number (useful for accessing the web interface),
- The source code of the installation script (with a link to the GitHub page as well),
This last point is important: before running a script from the Internet on your Proxmox VE server, take the time to review it! Even if it comes from a trusted source, stay vigilant: that is a golden rule.
To launch the operation, it's simple: copy and paste the command line and run it on your Proxmox server from the terminal (local or SSH). However, by switching to "Advanced" mode, you can adjust the configuration of the container that will be created: CPU, RAM, and disk. By default, each service has a predefined configuration, but you still remain in control.
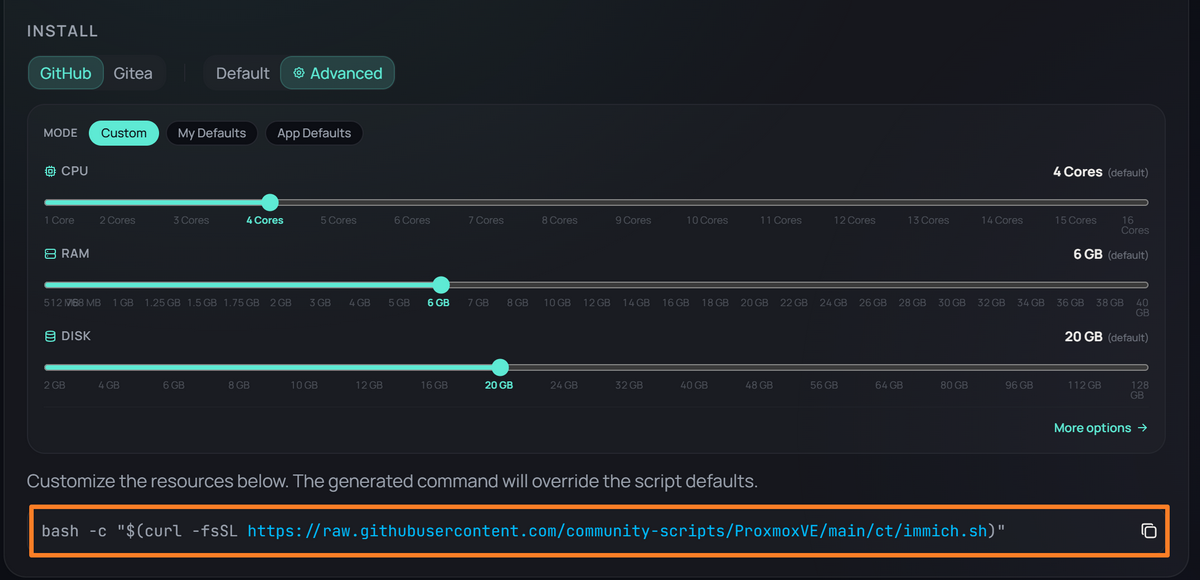
In this case, variables with the new values will be dynamically added to the command line you need to run. For example:
var_ram="8192" var_disk="32" bash -c "$(curl -fsSL https://raw.githubusercontent.com/community-scripts/ProxmoxVE/main/ct/immich.sh)"The scripts are executed using a bash -c command combined with the curl utility, which retrieves the Bash script from GitHub (or Gitea). In this way, the command fetches the raw source code and executes it. An interactive menu then appears directly in the terminal to guide you through the installation (unless you use the "Generator").
The assistant offers several installation modes:
- Default Install : this mode applies predefined settings. It allocates the RAM, CPU cores, and disk space deemed appropriate by the script developer. The IP address will be obtained via DHCP. This mode is suitable for quick tests.
- Advanced Install : it is recommended to choose this mode to customize the deployment. In fact, it lets you manually define the entire configuration:
- The container ID (CT ID).
- The container type (Privileged or Unprivileged).
- The root password for the instance.
- The allocated hardware resources (CPU cores, RAM, Swap).
- The storage volume to use.
- The static IP address, subnet mask, and default gateway.
- The VLAN tag, useful if your network is segmented.
- Etc...
- User Defaults : this lets you use the default values defined by you, the user. When you install an application for the first time, your choices are stored in a file and can be reused later (so you keep your preferences).
Once the settings are validated, the script downloads the operating system image, configures the instance, starts it, and then runs a post-installation script inside the container to install the application (Docker here).

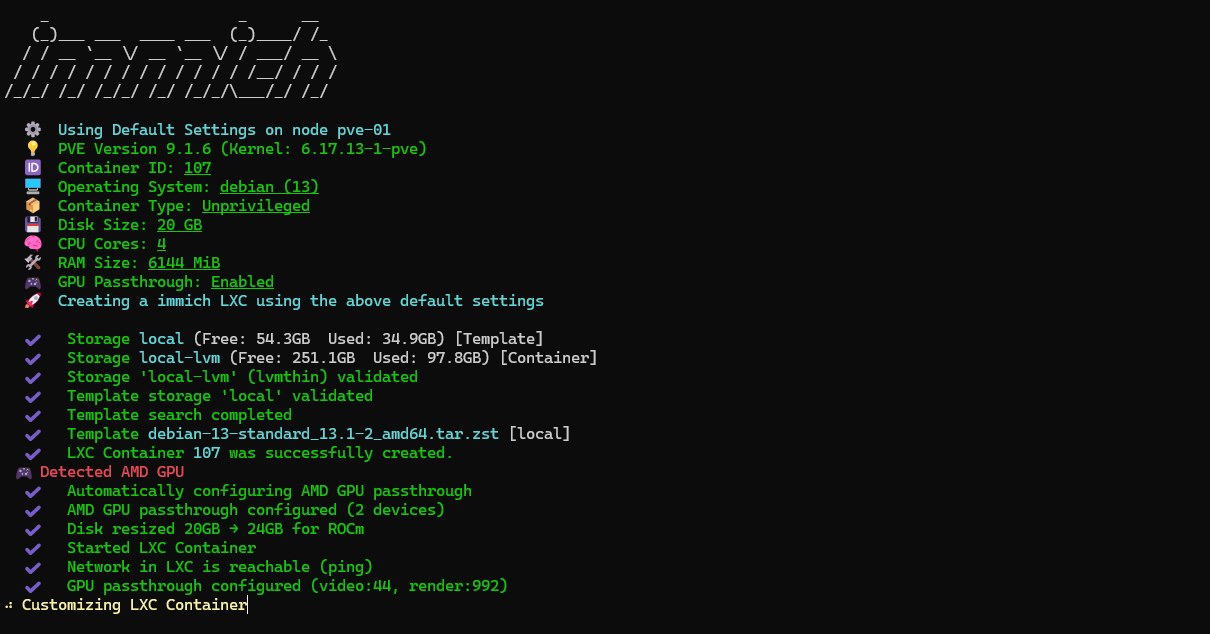
The installation runs fully autonomously, and the console output lets you follow the progress of the operations. At the end, when an application is installed, you'll always get the access URL, as here: http://192.168.110.13:2283.
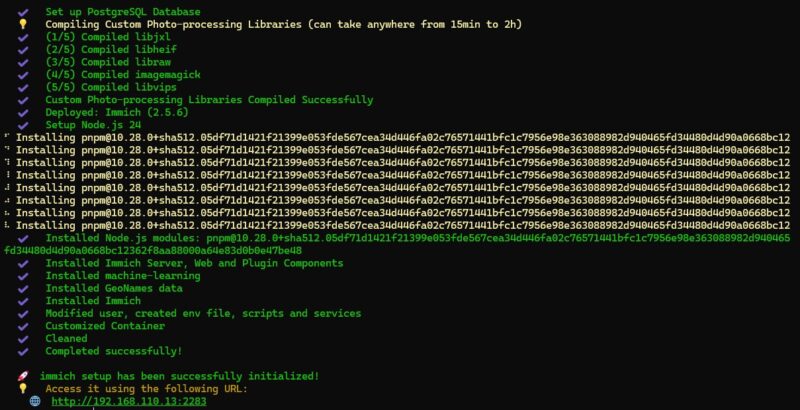
All you have to do is access that URL to reach the application! See for yourself.

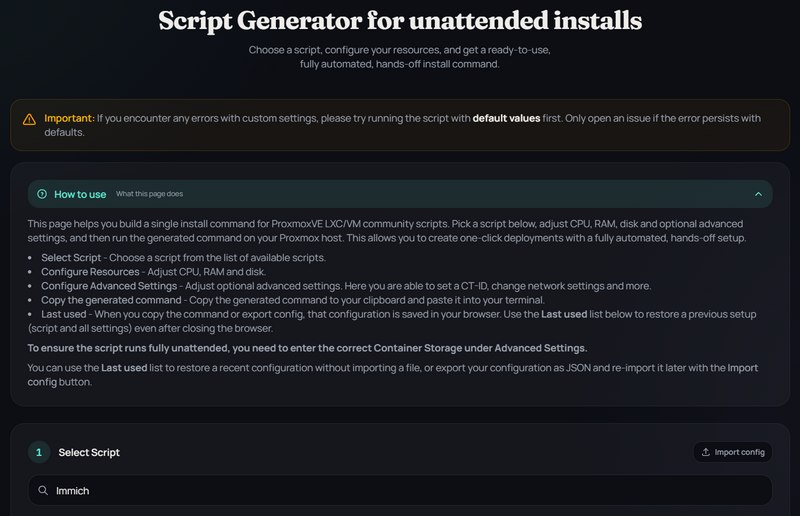
The Custom Script Generator
From the official website for this project, you can access a script generator to automate installation using an unattended approach. Just click "Generator" in the menu.
You choose the script to customize, namely the one for the application you want to deploy.
You then define the resources to allocate to that LXC container or VM.
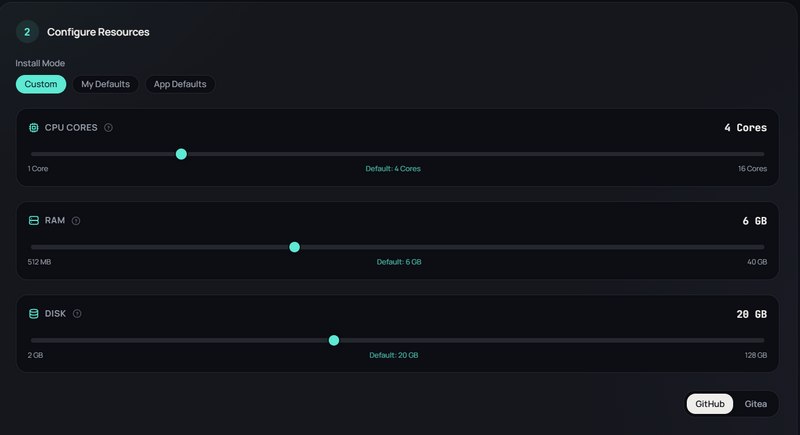
Then you can customize everything else: container ID, hostname, password, network bridge to connect to, VLAN ID, and even options such as SSH, GPU Passthrough, and Nesting.
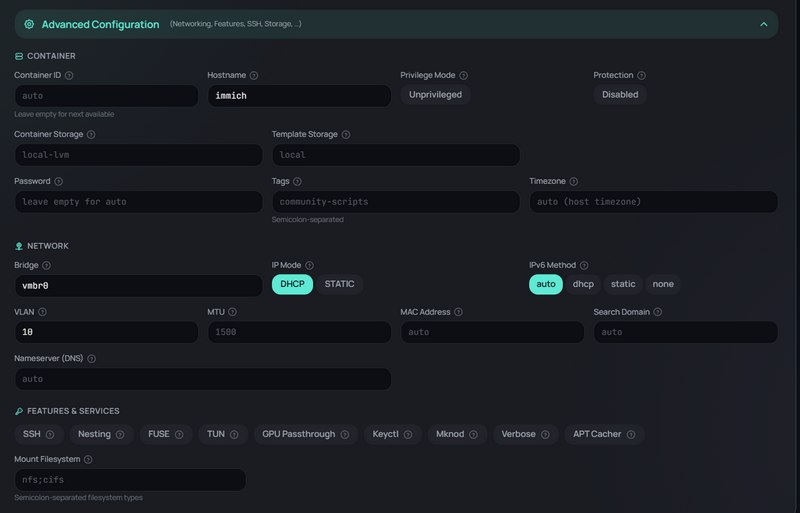
Once the configuration has been completed through this online interface, you get a ready-to-use command. This command contains preconfigured variables that reflect the choices made in the generator form.
Here is an example:
mode=generated var_ctid="500" var_hostname="immich-itconnect" var_vlan="10" var_tags="media" var_gpu="yes" bash -c "$(curl -fsSL https://raw.githubusercontent.com/community-scripts/ProxmoxVE/main/ct/immich.sh)"If you run the resulting command, the installation will start and you won't have to do anything! Everything is automatic (note the presence of mode=generated).
Managing Maintenance and Administration Tasks
The Helper-Scripts are not limited to instance creation. Many scripts help maintain the hypervisor and containers.
Script for Proxmox VE Post-Installation
There are also scripts intended to configure the Proxmox host itself, especially after a fresh installation. These tools, called "Post-Install Scripts", automate common administration tasks and are designed for Proxmox VE, as well as Proxmox Mail Gateway and Proxmox Backup Server (PBS).
In the case of Proxmox VE, the script named PVE Post Install performs a set of actions:
- Disabling the warning message related to the lack of a commercial subscription (Enterprise Repository).
- Adding the community repositories (No-Subscription Repository) to allow system updates via
apt. - Updating the Proxmox VE node (packages)
- Disabling unnecessary services if you do not plan to run in cluster mode (reversible)
- Etc...
Each time, you get to choose: you remain in control. The script does not force anything.
LXC Container Update Script
Some applications hosted in LXC do not have a simple built-in update mechanism. Specific scripts can automate this process. By running an update script (often called an update script), the system connects to the container, stops the relevant services, downloads the latest version of the application from its official repository, installs it, and restarts the service, all while preserving the user's configuration data.
There are actually two categories of update scripts:
- Scripts to update the OS inside LXC containers (they do not touch the application).
- Scripts to update the application itself.
For example, the PVE LXC Updater script is used specifically to update the operating system. For its part, the PVE LXC Apps Updater script updates applications. To do so, it watches tags on LXC containers in order to target containers with the community-script or proxmox-helper-scripts tag (by default, since this is customizable).
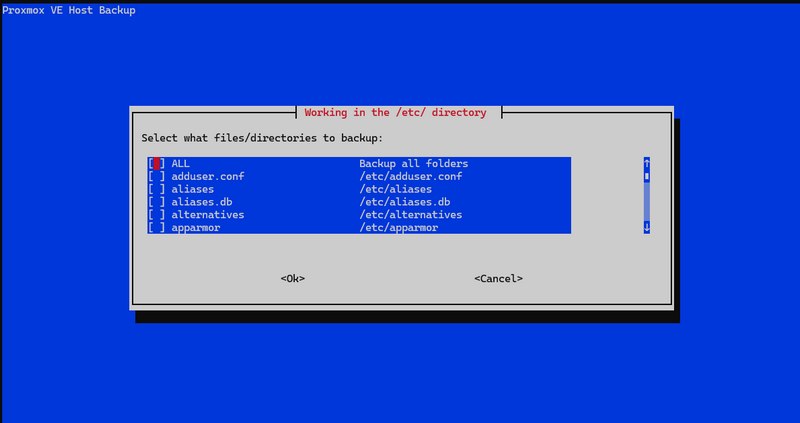
Proxmox VE Backup Script
One last use case and script worth mentioning: PVE Host Backup. This script allows users to back up data while also offering the ability to select specific files and directories to include. This flexibility gives it broad compatibility that goes beyond Proxmox (thanks, Bash).
Within the Proxmox VE context, this script makes it easier to back up system files.
Conclusion
Using Proxmox VE Helper-Scripts is an effective way to streamline service deployments by reducing manual, repetitive tasks. If you like testing different applications, this will save you a lot of time! You can also use these scripts as inspiration to write your own installation scripts.
Always make sure to prefer unprivileged containers and review the script source code before running it. This is especially true for applications with few installations, even though the Helper-Scripts are widely used and reviewed by the community.