How to Create a Windows 11 Virtual Machine in Proxmox VE
How do you install Windows 11 in a Proxmox VE virtual machine? That is the question this article will answer. This VM must meet a specific configuration, and a few subtleties need to be considered, which makes this an interesting use case.
We will start by covering the prerequisites and required resources, then move on to the step-by-step creation of this virtual machine and the installation of the Windows 11 operating system.
As a reminder, if you need help getting started with Proxmox, check out this tutorial:
Table of Contents
Prerequisites
On one side, there is Proxmox VE, a solution based on QEMU/KVM technology for virtualization and running virtual machines. On the other side, there is Windows 11, an operating system that requires special attention because it has specific prerequisites: UEFI, TPM 2.0, 64 GB of storage, and so on. This means we need to configure the VM in a very specific way.
In terms of required resources, you will need the Windows 11 installation ISO file. This file is not provided by Proxmox VE and must be obtained from Microsoft’s website via this link:
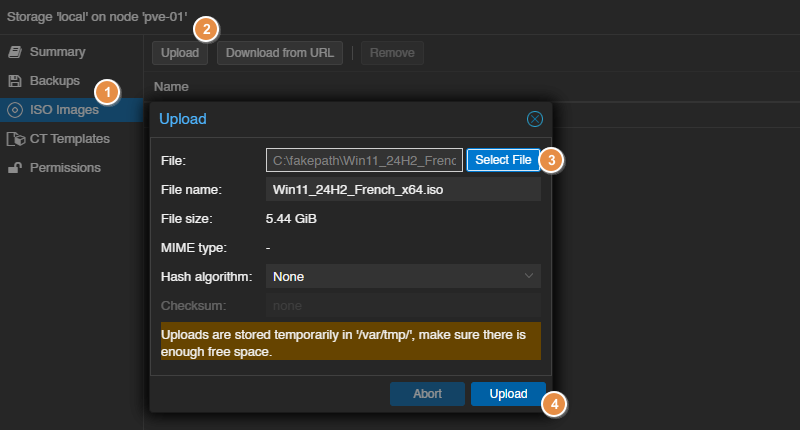
The ISO image must be uploaded to the ISO image library on your Proxmox server.
1 - Click on your server’s local storage, then choose "ISO Images" from the submenu.
2 - Click the "Upload" button to upload your ISO image.
3 - Select the Windows 11 ISO image; in this case, it will be a Windows 11 24H2 ISO image.
4 - Start uploading the file by clicking the "Upload" button and wait a moment.
You will also need VirtIO drivers. Indeed, Proxmox VE provides VirtIO paravirtualized devices that offer the best performance with low CPU overhead. For Windows, these drivers must be installed manually in the guest operating system during (and after) installation.
The VirtIO driver package for Windows is available as ISO images hosted on Fedora’s website. This page lists the links and useful information about VirtIO drivers for Windows. In particular, it provides two links to download the ISO images containing the drivers:
- VirtIO driver for Windows - Stable version (latest stable)
- VirtIO driver for Windows - Latest version
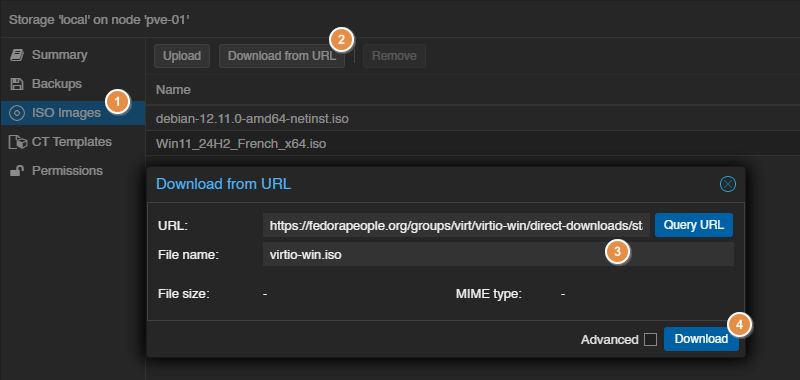
Here, we will use the stable version (although both work) for stability reasons. Still from your PVE, start downloading the VirtIO driver ISO image:
1 - Click on your server’s local storage, then choose "ISO Images" from the submenu.
2 - Click the "Download from URL" button to download your image from the Internet.
3 - Specify the URL to the ISO image: you can copy the link from the list above, since it points directly to the ISO file. Also specify a name for this file.
4 - Start downloading the file by clicking the "Download" button and wait a moment.
You now have the two ISO images required to install Windows 11.
We just mentioned a term that may be new to you: paravirtualization. This should not be confused with virtualization, because there are subtleties, and Proxmox VE can combine both. In short:
- Virtualization: the hypervisor fully emulates the hardware, and the guest OS does not know it is running in a virtual machine.
- Paravirtualization: the guest OS is aware that it is virtualized and uses special drivers (such as VirtIO drivers here) to communicate more efficiently with the hypervisor.
Create a Windows 11 VM on Proxmox
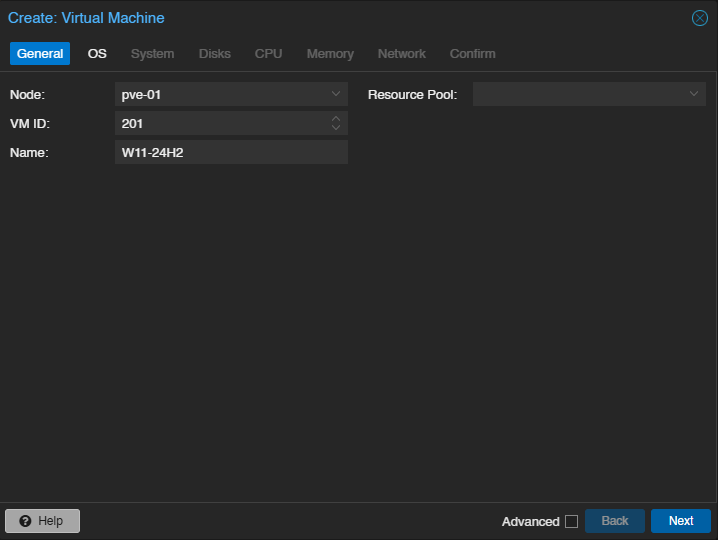
We will now move on to the creation of the Windows 11 virtual machine on Proxmox VE. Click the "Create VM" button located in the top-right corner of the interface. Start by entering a name for this VM and optionally a custom ID (optional).
OS Step
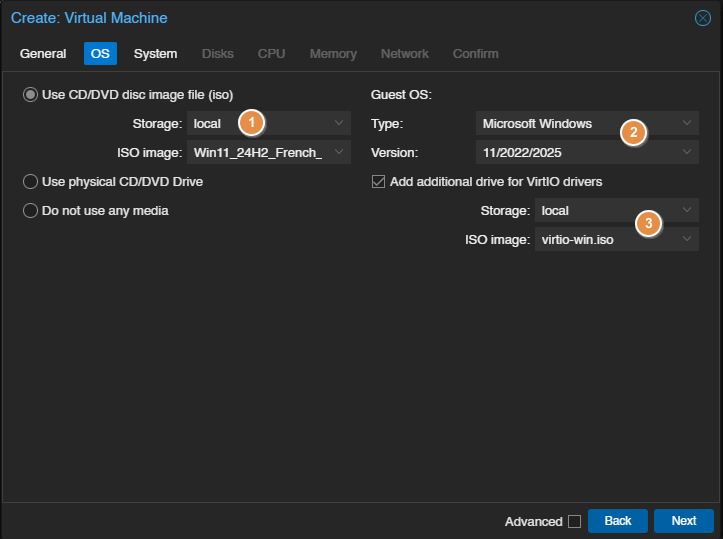
This is the first essential step for what follows. I would like to draw your attention to three points:
1 - Choose the Windows 11 installation ISO image; it will be attached to the VM’s virtual CD/DVD drive.
2 - Select the guest operating system type corresponding to Windows 11, namely the "Microsoft Windows" type and the "11/2022/2025" version. This is not a date; it is a reference to Windows 11 and Windows Server 2022 or 2025.
3 - Check the option "Add additional drive for VirtIO drivers" and select the ISO image containing the VirtIO drivers. This will connect a second CD/DVD drive to the VM so you can easily access the driver.
System Step
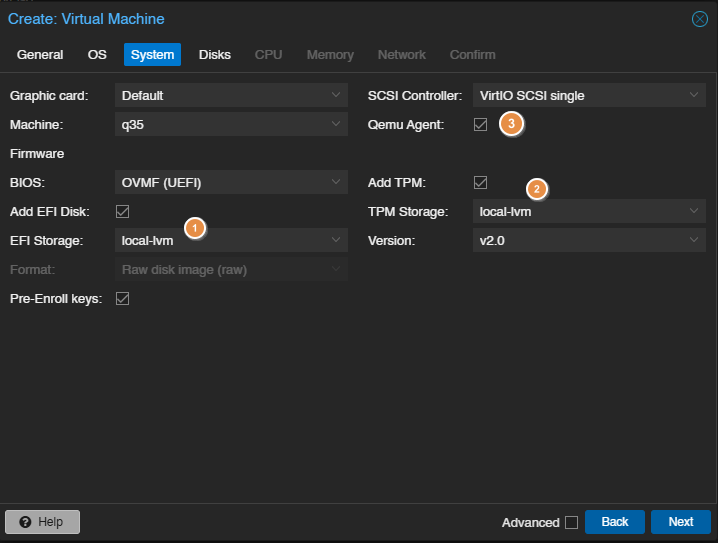
This step also deserves special attention to create a VM that complies with Windows 11 requirements.
1 - The "OVMF (UEFI)" BIOS type is normally selected automatically. You only need to choose the location for the EFI disk.
2 - The TPM chip is also enabled by default since we selected Windows 11 in the previous step. Make sure this is the case, choose a storage location, and also verify that a TPM 2.0 chip is selected.
3 - Check the "Qemu Agent" option. The QEMU agent for Windows is a small piece of software installed inside the VM that allows Proxmox to interact with the guest system, for example to perform a clean shutdown.
Disks Step
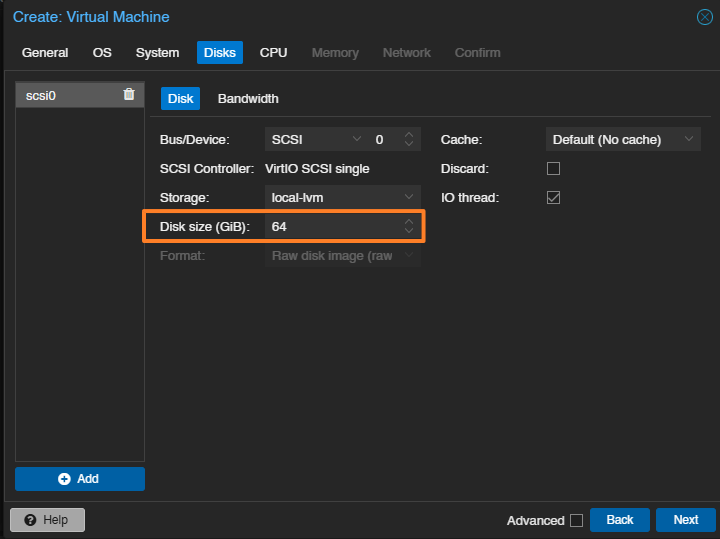
You must specify the size of the virtual machine’s main hard disk. It is possible to use an SCSI disk via the VirtIO SCSI controller. Keep in mind that we will need to install a driver during OS installation. Here, specify at least 64 GB, as this is a Windows 11 requirement.
Even though it is not visible in the image below, you must check the "Discard" option for better thin provisioning management on SSD drives.
CPU Step
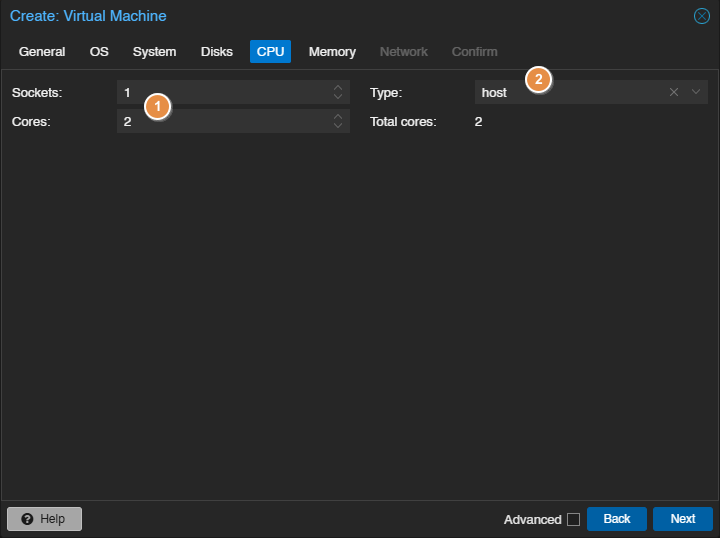
It is time to configure the virtual machine processor, which is an opportunity to define the number of cores and the processor type. You must:
1 - Assign at least 2 cores to the virtual machine.
2 - Select the "Host" processor type. Indeed, the Host CPU type for a Windows 11 VM exposes all features of the physical processor, which ensures compatibility with Windows 11 hardware requirements (and some applications). In short, this is beneficial for VM stability.
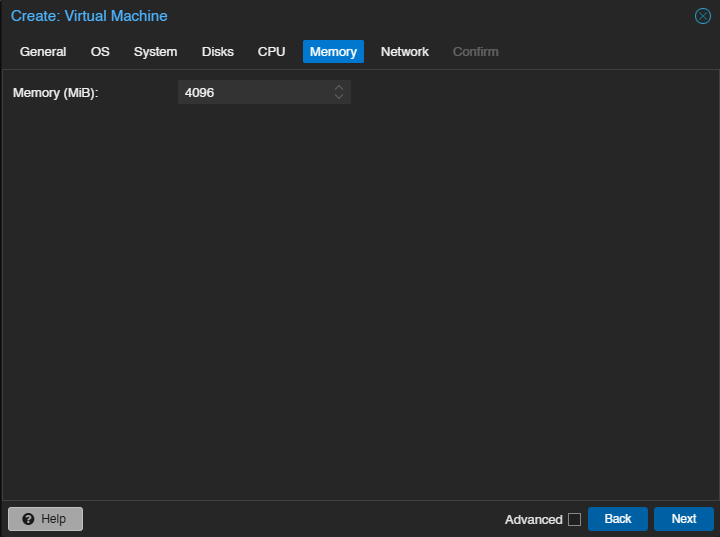
Memory Step
Allocate at least 4 GB of RAM (random access memory) to this virtual machine. Again, this is a Windows 11 prerequisite.
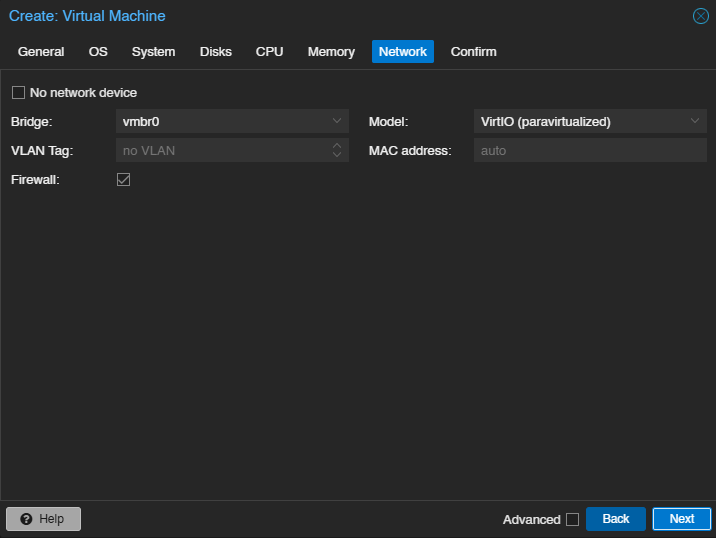
Network Step
Connect the VM to a network, such as the vmbr0 network here (created by default). Regarding the network adapter model, you can choose "VirtIO (paravirtualized)" or another model, but this first choice requires installing an additional driver.
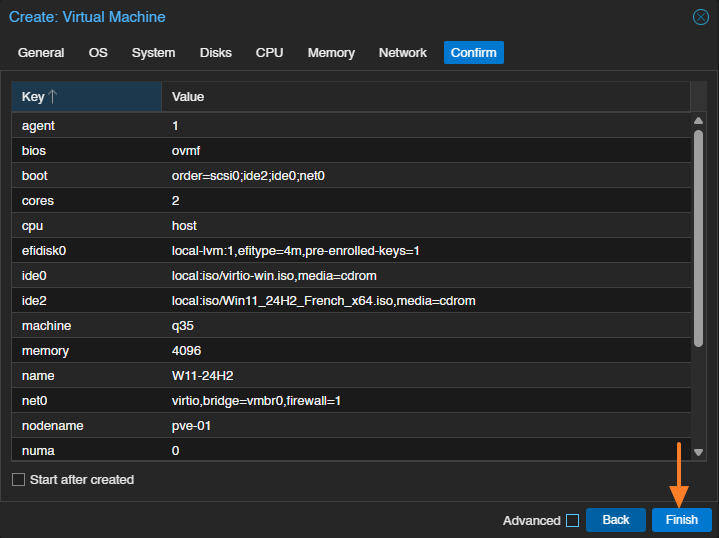
Confirm Step
Review your configuration and click the "Finish" button to complete VM creation.
Wait a moment. The virtual machine should appear in your PVE inventory.
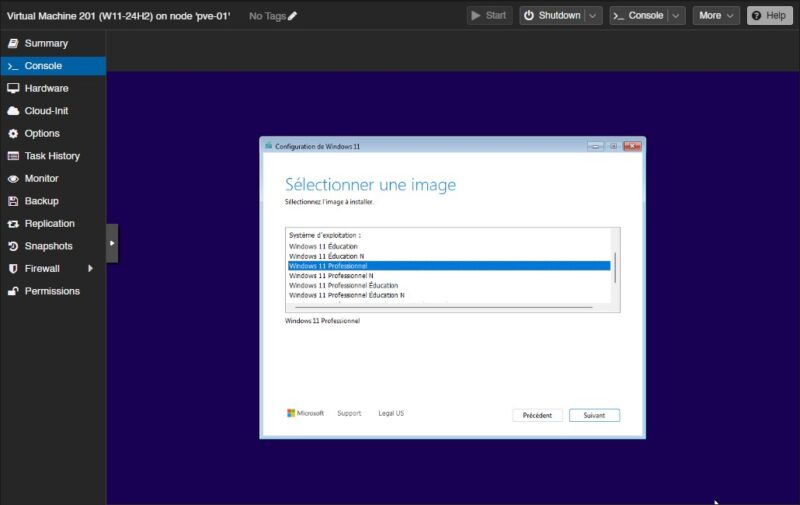
Install Windows 11 with VirtIO Drivers
The next step is to install Windows 11 on the virtual machine. Start the VM and, through the console, press a key to boot from the ISO image. The usual Windows 11 installation wizard will appear on the screen... Just follow along...
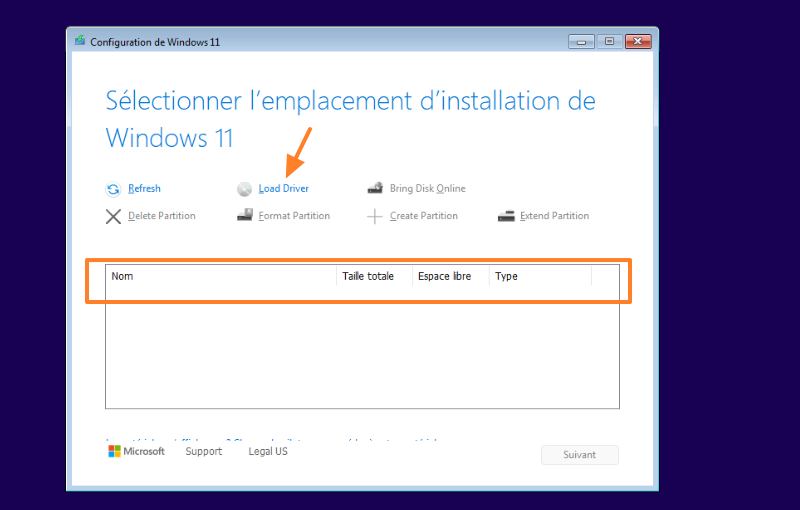
We will only review the steps where you may encounter blocks. For example, when selecting the disk on which to install Windows 11, you may get an unpleasant surprise: an empty list! Don’t panic, this is because the VirtIO controller driver is not included in the Windows 11 ISO image, but we planned for that... Click the "Load Driver" button.
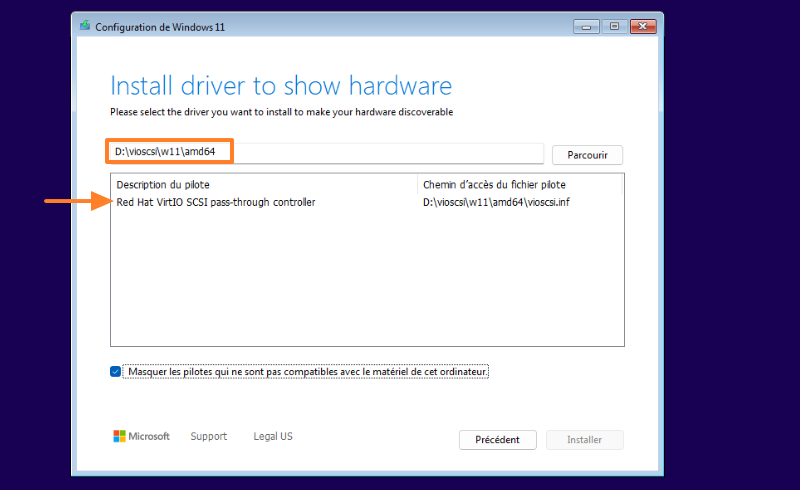
Click the "Browse" button, then in the DVD drive corresponding to the VirtIO ISO image, select the folder D:\vioscsi\w11\adm64. Confirm. A driver named Red Hat VirtIO SCSI pass-throuth controller should appear. Select it and click the "Install" button.
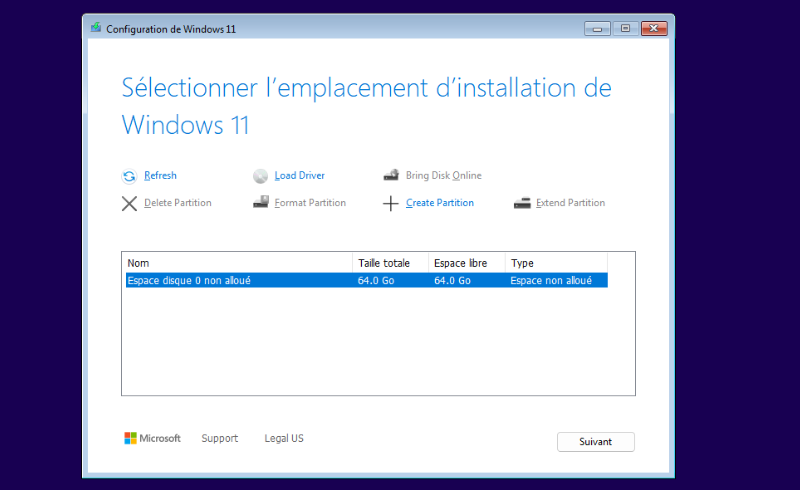
Ah, that’s better! The disk now appears! Continue the installation...
Installation will begin and continue... You will go through several steps and may find yourself blocked at the network connection step! The network card will not be recognized, again because of a driver issue. Click the "Install driver" button, select the VirtIO drive, and confirm (Windows will search for the driver automatically).

A few seconds later, the virtual machine will be connected to the network. Sometimes an error code appears, but it is not a problem. Continue and complete the installation. The rest will go smoothly.

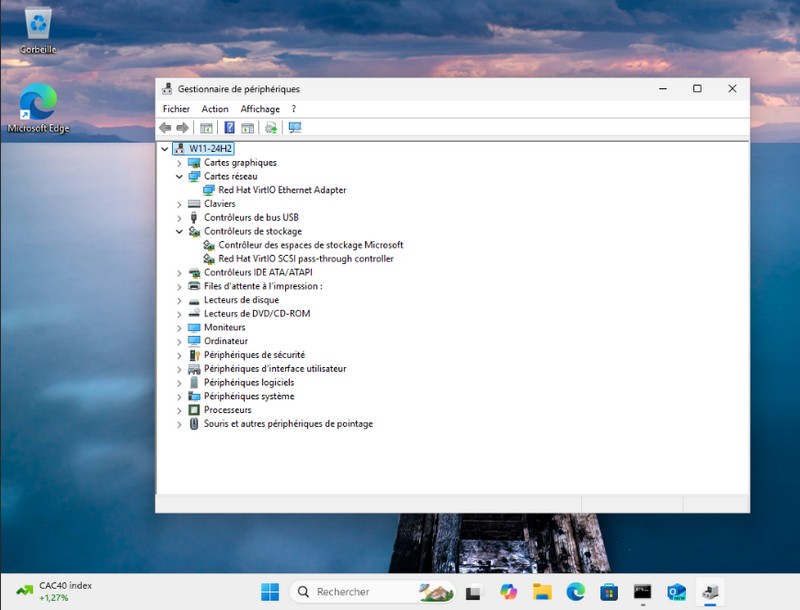
If you take a look at the list of devices, you will see the VirtIO devices listed. This is also a good opportunity to check whether any drivers are missing.
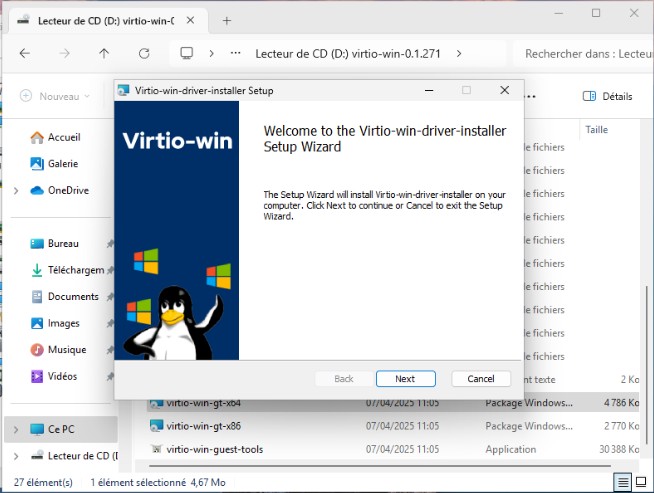
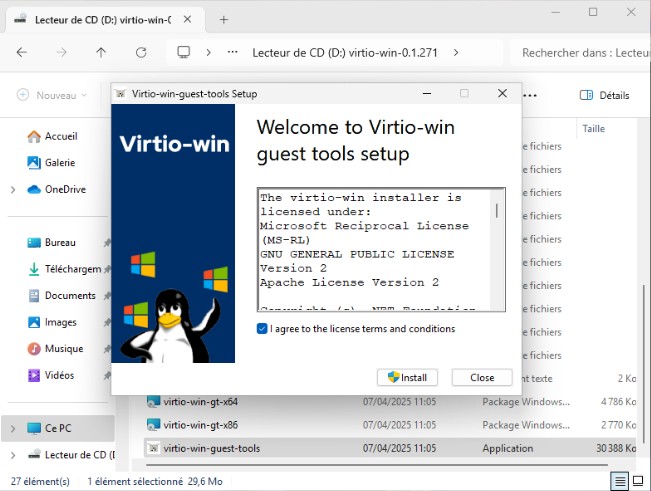
To finish the installation, I recommend opening the DVD drive corresponding to VirtIO Win to install two packages: virtio-win-gt-x64 (all drivers) and virtio-win-guest-tools (the Qemu agent and guest tools in general).
There you go, your Windows 11 virtual machine is ready!
Conclusion
This tutorial walked you through all the steps required to deploy a Windows 11 virtual machine on Proxmox VE while meeting the OS prerequisites. It was also an opportunity to discover Host CPU mode and VirtIO driver integration.