
Proxmox VE: Run OCI (Docker) Images Natively in LXC
Proxmox VE 9.1 introduced a much-anticipated feature for LXC containers: the ability to launch application container images (from Docker Hub or GitHub) without going through an intermediate virtual machine or installing Docker. The reason: OCI image support.
In our tutorial on getting started with LXC containers, we saw how to deploy "system containers" (a full Debian or Ubuntu). Today, we will learn how to take advantage of native OCI (Open Container Initiative) image integration. This feature makes it possible, for example, to deploy a monitoring solution such as Uptime Kuma or an Nginx web server very quickly, by pulling from the existing image library while still benefiting from the lightweight nature of LXC.
You can also read my previous Proxmox VE tutorials:
- Getting started with Proxmox VE: the complete guide
- Proxmox VE: how to create a Windows 11 virtual machine?
- Proxmox VE: snapshot management
- Network configuration with Proxmox VE: the getting started guide
Table of Contents
OCI on LXC: what changes
To fully understand what this new feature changes (still considered to be in preview), we need to look at the difference between a system container and an application container.
Until now, to run a "containerized" application on Proxmox VE, the administrator had to carry out the following steps:
- Create a virtual machine or a standard LXC container (Debian).
- Install the Docker engine inside the VM or container.
- Launch the container via
docker runor Docker Compose.
With native OCI image support, Proxmox removes the middle layer, meaning the need to create an LXC container or a virtual machine. The hypervisor can download the image and run it directly with the LXC engine. However, it is important to understand that Proxmox VE does not include a Docker engine!
You run the nginx:alpine or uptime-kuma image directly on the Proxmox kernel via an LXC container. No Docker Daemon, no VM, just the OCI image layers.
A closer look at OCI images: beyond Docker
Before working with these images in practice on Proxmox VE, I think it is important to demystify the term OCI images. An OCI image is not necessarily a Docker image.
OCI stands for Open Container Initiative
This is a common standard adopted by the tech giants (Docker, Google, Red Hat, IBM) for container images. This standard is important to avoid a standards war that would have fragmented the market.
To use a simple analogy: imagine the OCI image is to containers what the MP3 format is to music. It does not matter whether you use VLC, Windows Media Player, or iTunes (the Runtime) to play the music, as long as the file is in MP3 format (the Standard), it will be read correctly.
Docker can read OCI images, just like Proxmox VE. Each in its own way, but the result is the same.
What is an OCI image made of?
In practical terms, when you download a Docker image (which is actually an OCI image), you get a structured archive containing three key elements:
- The manifest (Manifest): it lists the files to download and the target CPU architecture (amd64, arm64).
- The layers (Layers): this is the file system, in the form of a layered millefeuille that together forms the image. For example, one layer for the base OS (Alpine), one layer for Python binaries, one layer for your application.
- The configuration: a JSON file that says "On startup, run the command
/app/start.sh" .
It is thanks to this standardization that Proxmox VE is able to perform the magic of "reading" OCI images.
You can imagine Proxmox VE carrying out the following steps:
- Download the layers from Docker Hub.
- Decompress and assemble them.
- Feed them to its own LXC engine, without needing to install the Docker engine.
LXC therefore remains the key component, and Docker is absent from this process.
Creating an LXC container with an OCI image
For this demonstration, we will use the monitoring tool Uptime Kuma as an example. It is lightweight, modern, and perfect for this use case.
Downloading an application image
The first step is to download the OCI image. There is no need to declare Docker Hub as a repository, because it is already defined in Proxmox VE.
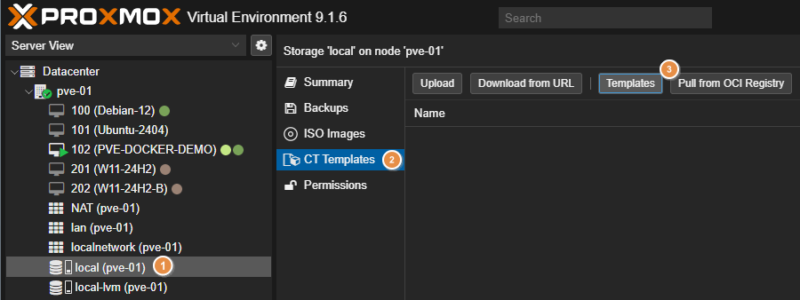
From the Proxmox VE web interface, follow these steps:
- Go to your storage (for example:
local). - Click on the "CT Templates" section, just like with classic LXC templates.
- Click the "Pull from OCI Registry" button located next to the other buttons (if you do not see it, you need to update PVE).
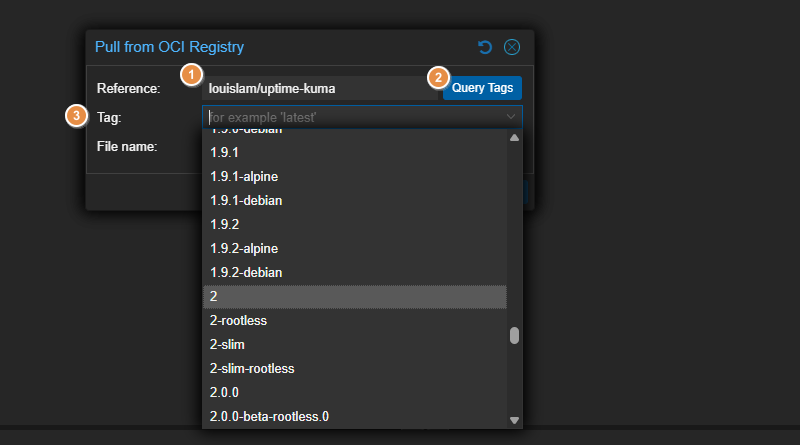
You then need to complete the form to specify the OCI image to download.
In the "Reference" field, enter the image name explicitly. Use the syntax owner/image or repository/owner/image. Here, that would be louislam/uptime-kuma or, more precisely:
- For Docker Hub:
docker.io/louislam/uptime-kuma - For GitHub (GHCR):
ghcr.io/louislam/uptime-kuma
You must then click on "Query tags" and, if the image was found, the list of tags (and versions) will be displayed. Here, I select tag 2 to retrieve the latest version of Uptime Kuma v2.
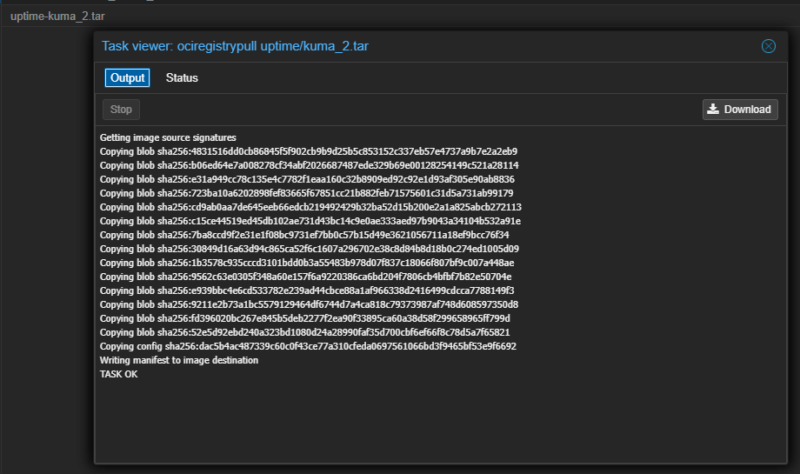
Start the download and wait a moment.
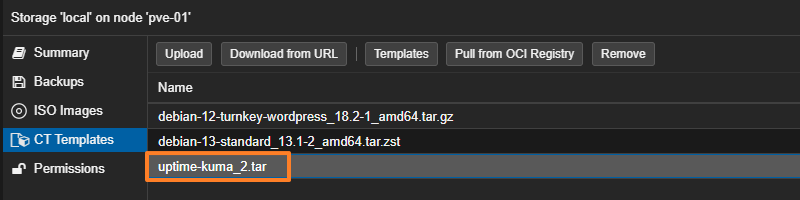
The OCI image appears in the library alongside the other templates already downloaded.
Creating and configuring the container
Container creation is very similar to that of a classic LXC. Once the image has been downloaded, click the "Create CT" button.
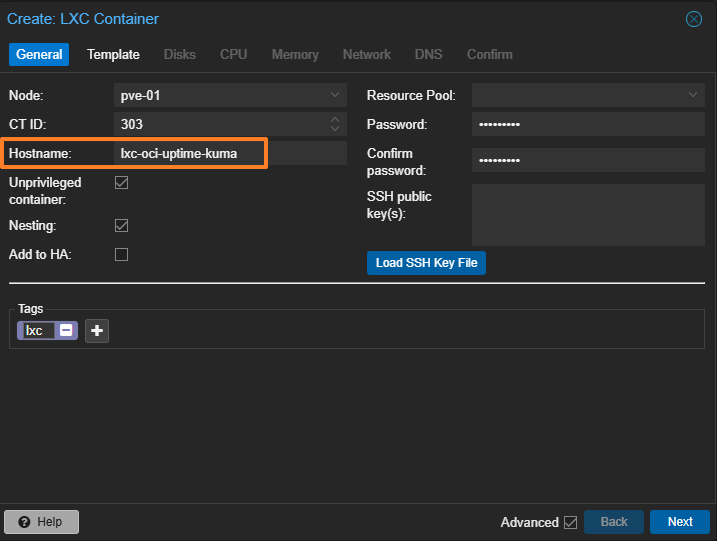
General tab
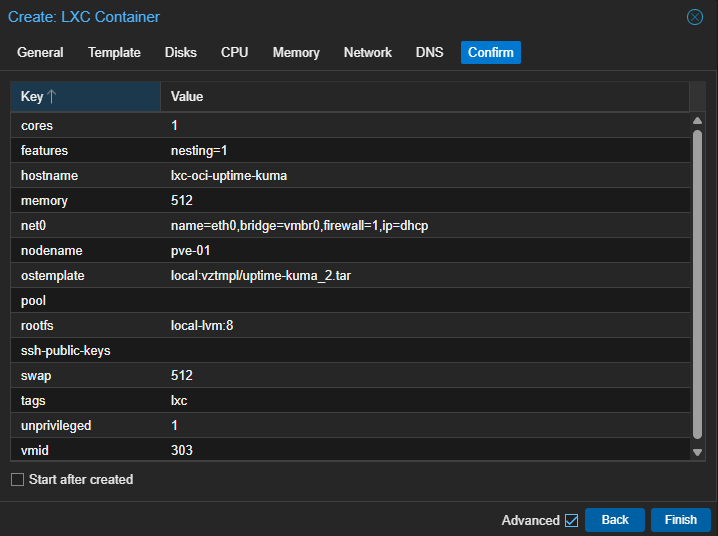
Assign an ID, for example 303, and a name such as lxc-oci-uptime-kuma. Uncheck "Unprivileged container" if you run into permission issues, although in our case Uptime Kuma will work fine in an unprivileged container.
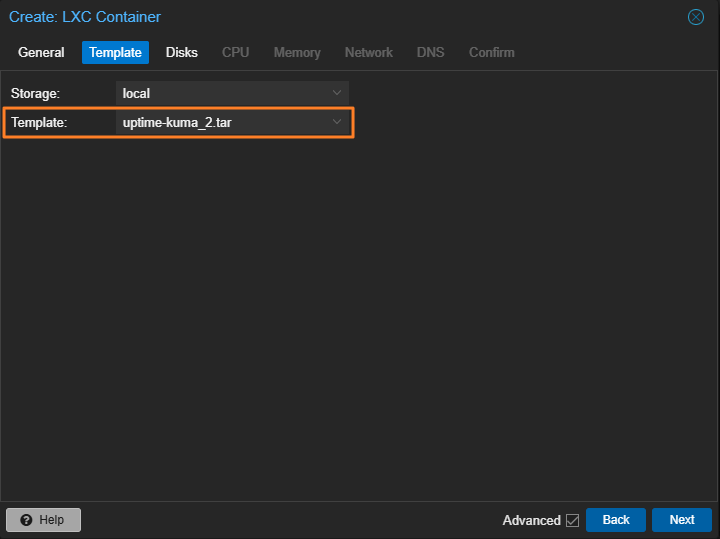
Template tab
Select the louislam/uptime-kuma image you just downloaded, even if it appears with the archive name.
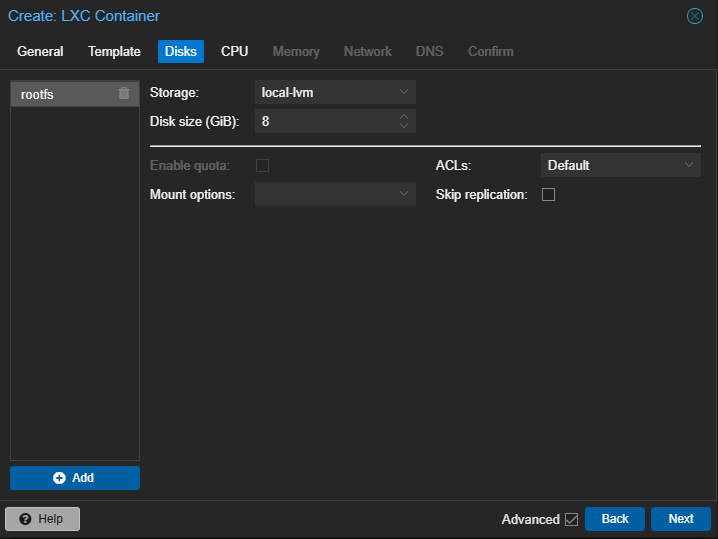
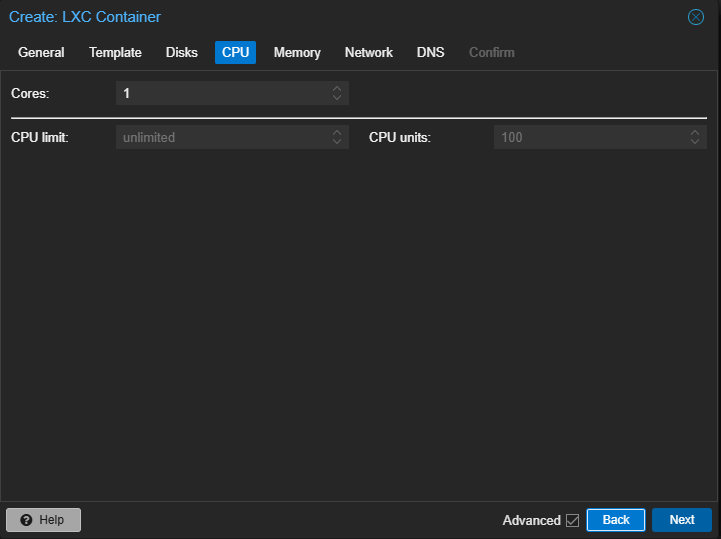
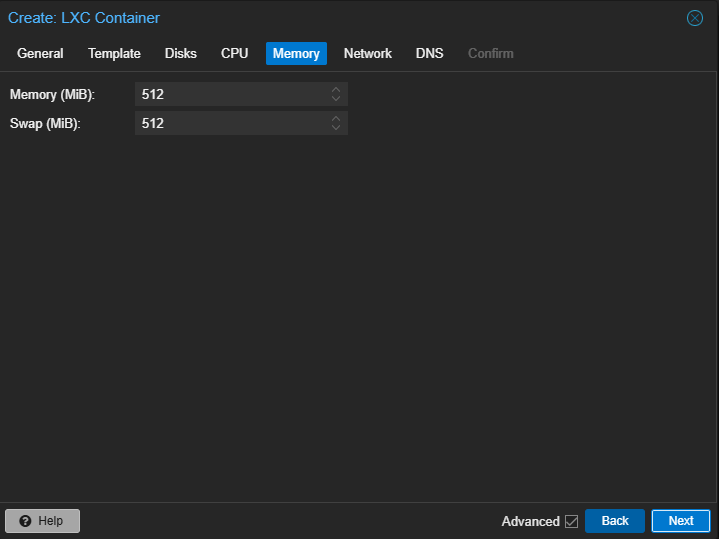
Disks/CPU/Memory tabs
Allocate the resources. Here, you should adapt them based on the application's needs. Uptime Kuma with only a few checks does not need many resources. Attaching a disk to the container means its storage will be persistent.
Network tab
Container networking is different depending on whether the OCI image is executed via LXC or Docker. With Docker, you would do port mapping (-p 3001:3001), whereas with LXC, the container has its own IP address on your network (via the vmbr0 bridge or another selected interface).
You can choose between DHCP or configuring a static IP address.
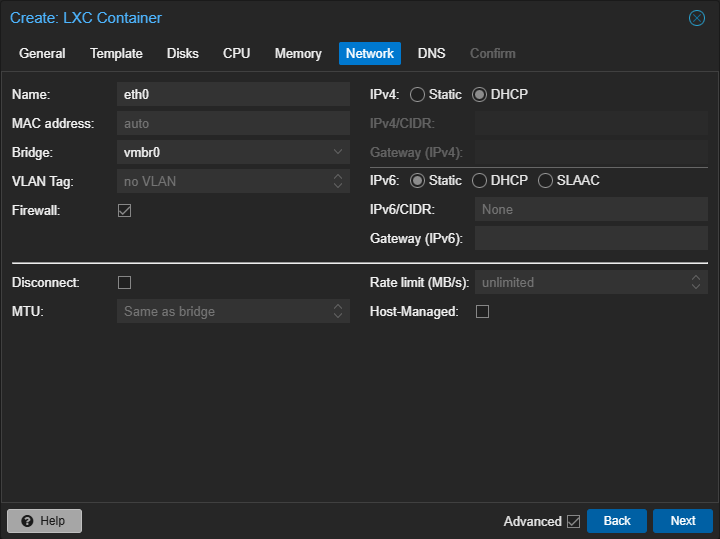
Configure DNS if needed.
Confirm to start creating the container.
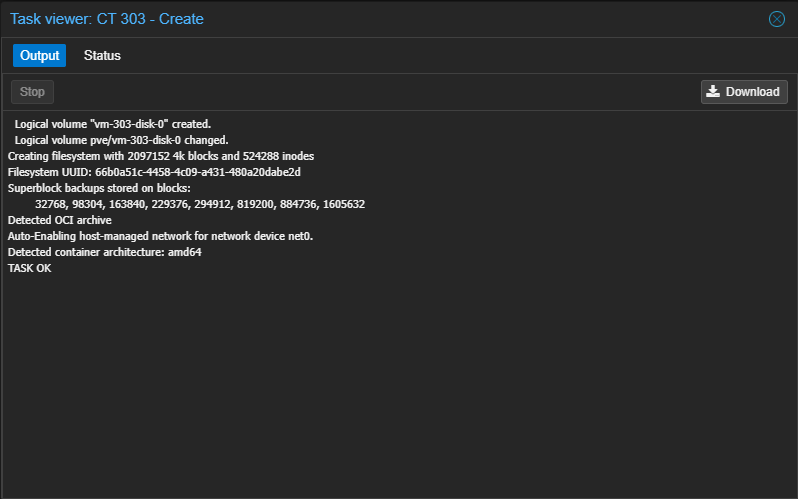
Wait while Proxmox does its magic.
Customizing environment variables
Before running a container, you can customize its configuration by adjusting environment variables. Indeed, when using an OCI image on Proxmox VE in native mode, it is not possible to tweak docker run command arguments or use Docker Compose directives. As a result, this is the method you can use to try to customize an application's configuration.
In the container's "Options" section, double-click "Environment". A window showing the environment variables defined in the OCI image will appear. You can add others, depending on what the deployed application supports (check the solution's documentation).
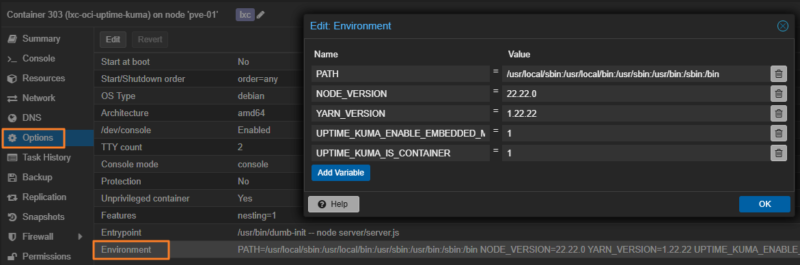
In Uptime Kuma's case, there are many environment variables. For example, the UPTIME_KUMA_PORT variable is used to customize the port used to access the web interface. This could let you specify 3002 instead of 3001 (the default port).
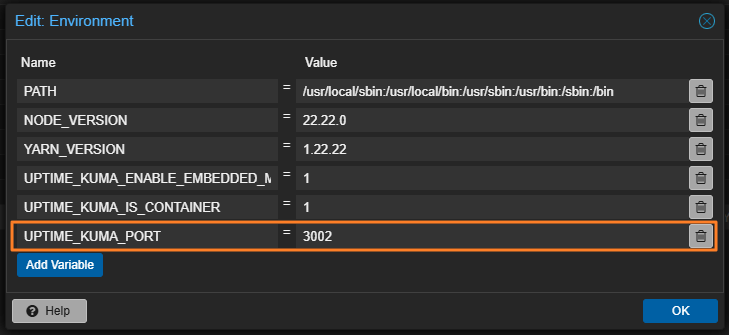
Once your changes are made, validate them. This can be edited at any time, but new values will only be taken into account after restarting the container.
First start of the container
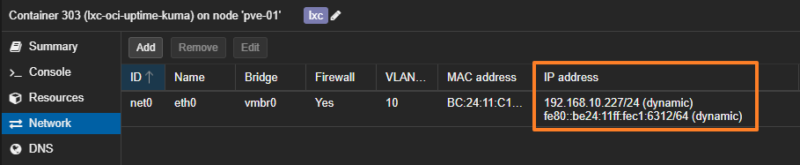
Right-click the container to start it via the "Start" button.

Click the "Network" tab to display the container's IP address. This will be useful to retrieve the IP address if the network card is configured with DHCP. In addition, with this type of application container, you do not always get a fully interactive shell, so the "Console" tab will not be very useful (this varies from one image to another).
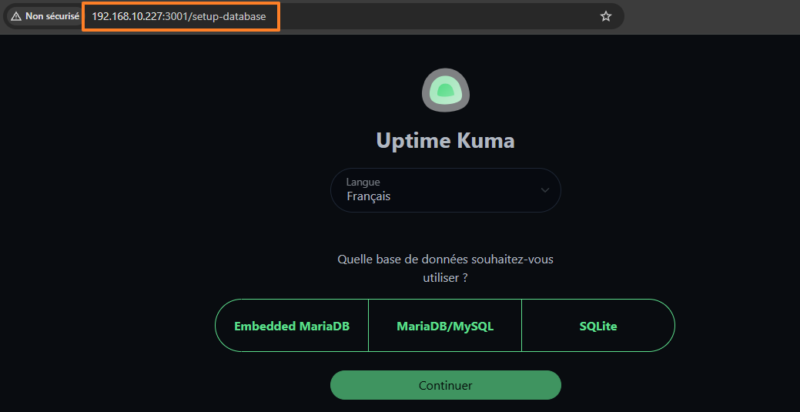
Open a browser and enter the container's IP address followed by port 3001 (or 3002 if the custom port variable has been applied). There, the application's interface appears on screen. All that remains is to complete the initial configuration and enjoy this containerized application!
The rest is specific to Uptime Kuma itself, especially for creating checks.
Conclusion
The integration of OCI images in Proxmox VE 9.1 marks an important step forward in the maturity of LXC containers with this open source hypervisor. It offers an alternative approach, somewhere between Docker and LXC, while still using the latter directly to run application containers.
This feature is ideal for applications such as Uptime Kuma, Home Assistant, Pi-hole, etc.... since it avoids the need for a container with a full system or even a virtual machine. However, it is not yet suitable for projects with multiple containers (such as a Docker Compose stack based on a set of microservices). Updating LXC containers based on an OCI image also appears to be a delicate operation, which I will cover in a future article.
FAQ: OCI images on Proxmox
Do I need to install Docker on my Proxmox to use OCI images?
No, absolutely not. That is precisely the point. Proxmox uses LXC to run the contents of the OCI image. The Docker engine is not present.
Can I use docker-compose.yml files?
No. This feature only supports single containers. You cannot orchestrate multiple containers with a YAML file as you would with Docker Compose. We will have to see whether a future version of Proxmox VE brings improvements in this area.
Can Portainer manage these LXC containers?
No. Portainer talks to the Docker API. Here, there is no Docker API. You must manage these containers through the Proxmox web interface or the pct command.
Do "Alpine" images work well?
Yes, very well. They are extremely lightweight and start almost instantly in an LXC container. They are lighter than a Debian, Ubuntu, or other image.
What is the RAM usage difference compared to a Docker VM?
It is significant. A Linux VM consumes at least 512 MB to 1 GB just for the operating system and the Docker engine. An OCI container on LXC uses only the RAM required by the application process (sometimes just a few megabytes). That is a huge gain.
Does networking work like Docker's "bridge"?
No. By default, the container is connected to the Proxmox bridge (vmbr0, for example). It behaves like a machine connected to your local network (it requests an IP address from your router/DHCP or uses a static IP).
Since docker logs does not exist, you need to consult the container console in Proxmox, or look directly at the log files in /var/log (if the application writes to them).