How to Install Sync-in on a Synology NAS
Deploying your own synchronization and document collaboration solution gives you full control over your data. If you have a Synology NAS, several options are available, including Synology Drive (the official package) or the open source Sync-in solution. As you may have guessed, this tutorial focuses on the second option.
This solution directly addresses the needs of both individuals and businesses looking to centralize their files while enabling simultaneous document editing through an integrated office suite (OnlyOffice or Collabora Online, depending on your preference).
In this tutorial, we will see how to set up Sync-in on a Synology NAS. Using containers via Docker (Container Manager on newer DSM versions) makes it possible to isolate services and simplify deployment. We will cover directory creation, configuration file preparation, stack deployment via Docker Compose, and the setup of the reverse proxy integrated into DSM to expose services over HTTPS.
If you want to discover the main features of Sync-in, I invite you to watch this video (or read the introductory article).
Table of Contents
DSM reverse proxy configuration
The first step is to configure the DSM reverse proxy. This is useful so that your Sync-in installation can be accessed securely from outside the network over HTTPS. We will use Synology's reverse proxy. In addition to the explanations below, I recommend reading these articles for declaring a *.synology.me domain name and obtaining a TLS certificate:
- Use a synology.me domain name on your Synology NAS
- Synology: publish a Web application with the Reverse Proxy
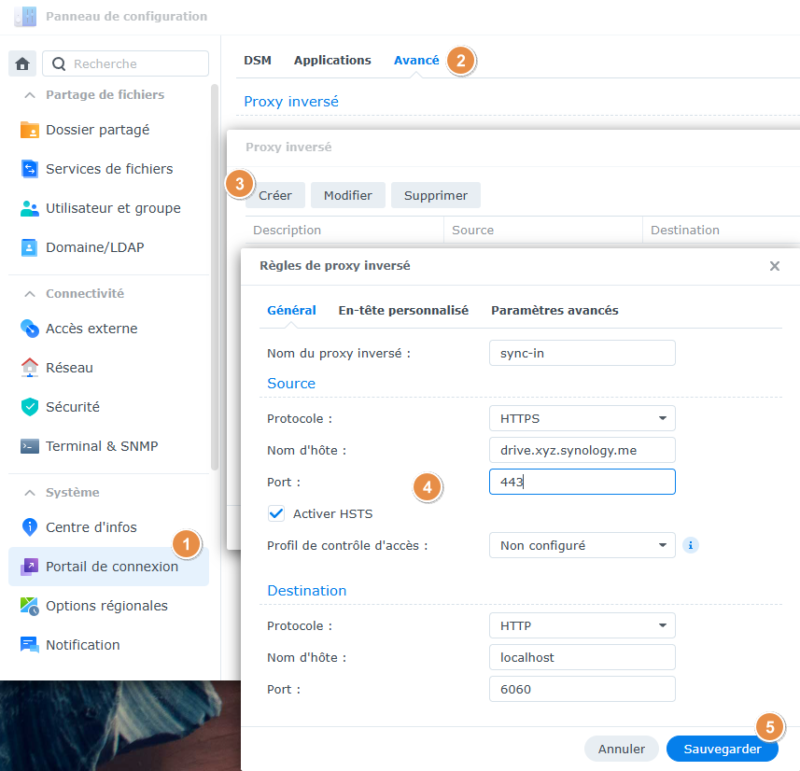
Go to Control Panel > Login Portal > Advanced and click Reverse Proxy. We need to create two separate rules: one for the main Sync-in interface and one for OnlyOffice.
Rule for the Sync-in web interface
Fill in the form as follows. This configuration means that Sync-in will be reachable by clients at the following address: https://drive.xyz.synology.me.
1 - Click Create.
2 - Name: sync-in
3 - Source:
- Protocol: HTTPS
- Hostname:
drive.xyz.synology.me - Port: 443
4 - Destination:
- Protocol: HTTP
- Hostname:
localhost - Port: 6060
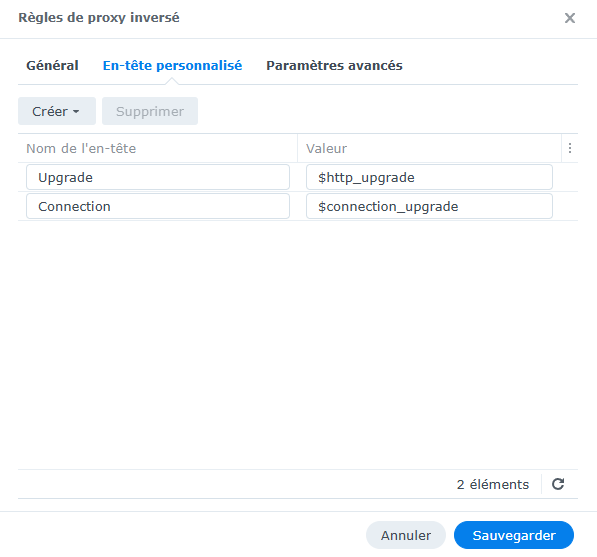
5 - In the Custom Header tab, use the drop-down menu to create the WebSocket headers. Sync-in needs them to work properly.
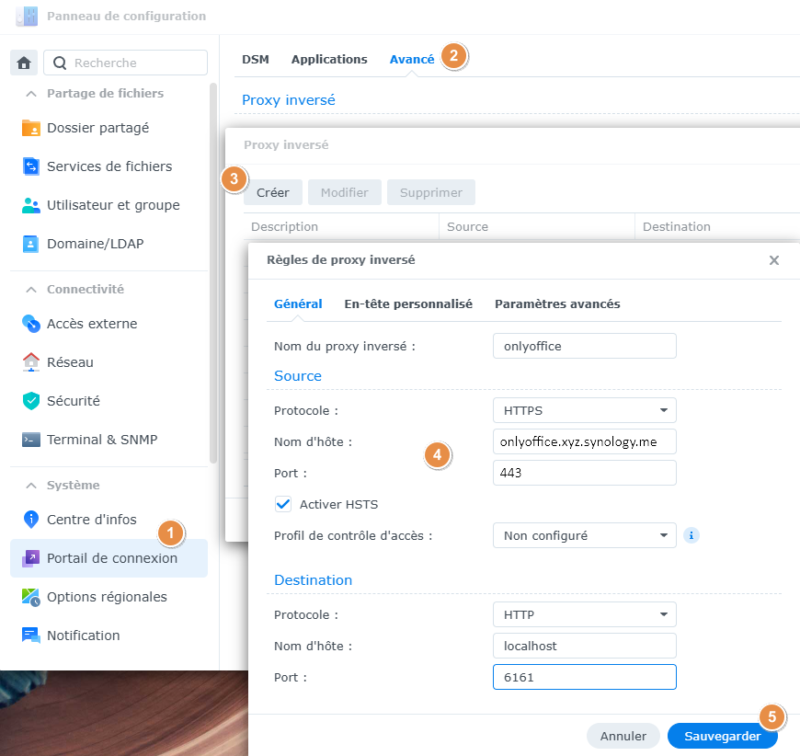
Rule for the OnlyOffice server
Fill in the form as follows. This configuration means that OnlyOffice will be reachable by clients at the following address: https://onlyoffice.xyz.synology.me.
1 - Click Create.
2 - Name: onlyoffice
3 - Source:
- Protocol: HTTPS
- Hostname:
onlyoffice.xyz.synology.me - Port: 443
4 - Destination:
- Protocol: HTTP
- Hostname:
localhost - Port: 6161
In the Custom Header tab, use the drop-down menu to create the WebSocket headers. OnlyOffice requires WebSockets to synchronize typing between multiple users in real time.
Preparing the folder structure on the NAS
The second step is to prepare the storage space that will hold the persistent data and configuration files for our application. This separation between the container and the data ensures that your files will not be deleted during a Docker image update. An essential point for an application intended to host your personal files.
Connect to your Synology NAS interface and open the File Station application. Go to the shared folder dedicated to containers, namely docker.
Inside this root folder, create the following directory structure:
- Create a main folder named
sync-in. - Inside this
sync-infolder, create the following three subfolders:data: which will contain the files synchronized by users.desktop_releases: which will store the desktop clients for deployment.mariadb_data: which will host the raw database files.
This structure is required so that the volumes defined in our Docker Compose file can bind mount to the NAS file system.
environment.yaml configuration file
Sync-in requires an external YAML configuration file to define several parameters, including encryption keys, the connection settings for the MariaDB instance, and the link with the OnlyOffice server (or Collabora Online, depending on your preference).
Using a text editor, create a file named environment.yaml at the root of your docker/sync-in/ folder and insert the following content:
mysql:
  url: mysql://root:MotDePasseMariaDB@mariadb:3306/sync_in
auth:
  encryptionKey: secret-1
  token:
    access:
      secret: secret-2
    refresh:
      secret: secret-3
applications:
  files:
    dataPath: /app/data
    collabora:
      enabled: false
    onlyoffice:
      enabled: true
      secret: secret-4
      externalServer: https://onlyoffice.xyz.synology.me
In this file, you must adjust several values. Indeed, some values are unique and must be generated for the different keys. You can use this IT-Tools utility to generate 64-character tokens.
You must:
- Specify a password for the MariaDB connection, instead of
MotDePasseMariaDB. - Enter a unique value instead of
secret-1tosecret-4. - Set the
enabled: truedirective underonlyofficeto enable the OnlyOffice integration. - Define the
externalServeraddress: this is the public domain name (and optionally the port) that the web client will use to access the online document editor.
Configuring the Sync-in Docker Compose file
Now that the directory structure and configuration file are ready, we will define the Docker stack. It relies on four containers: Sync-in (the core application), the Sync-in desktop client distribution, MariaDB, and OnlyOffice.
Create a docker-compose.yml file (or use the project creation interface in Container Manager). Make sure to use the /docker/sync-in folder as the root of this project.
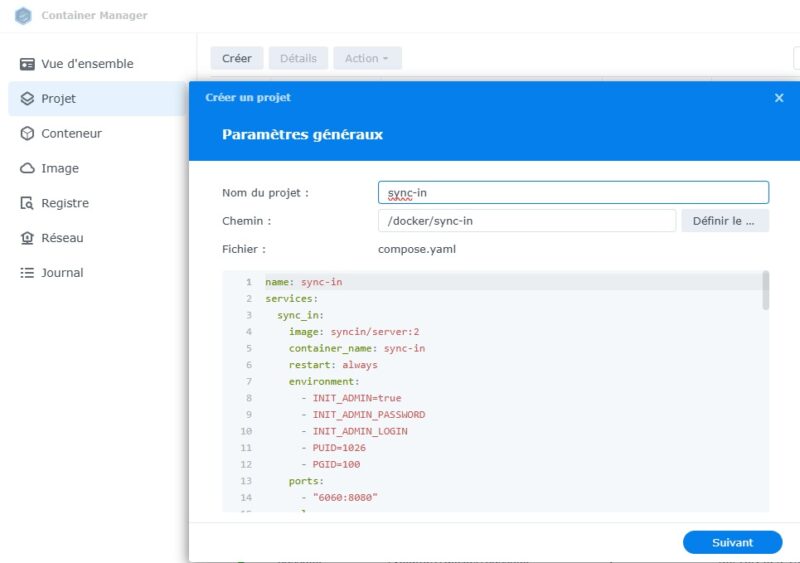
Insert the following code:
name: sync-in
services:
  sync_in:
    image: syncin/server:2
    container_name: sync-in
    restart: always
    environment:
      - INIT_ADMIN=true
      - INIT_ADMIN_PASSWORD
      - INIT_ADMIN_LOGIN
      - PUID=1026
      - PGID=100
    ports:
      - "6060:8080"
    volumes:
      - /volume1/docker/sync-in/environment.yaml:/app/environment/environment.yaml
      - /volume1/docker/sync-in/data:/app/data:rw
      - /volume1/docker/sync-in/desktop_releases:/app/static/releases:ro
    depends_on:
      - mariadb
    logging:
      driver: json-file
      options:
        max-size: "25m"
        max-file: "5"
    networks:
      - sync_in_network

  mariadb:
    image: mariadb:11
    container_name: mariadb
    restart: always
    command: --innodb_ft_cache_size=16000000 --max-allowed-packet=1G
    environment:
      MYSQL_ROOT_PASSWORD: MotDePasseMariaDB
      MYSQL_DATABASE: sync_in
    volumes:
      - /volume1/docker/sync-in/mariadb_data:/var/lib/mysql
    networks:
      - sync_in_network

  onlyoffice:
    image: onlyoffice/documentserver:9.2
    container_name: onlyoffice
    restart: always
    environment:
      - JWT_SECRET=secret-4
      - JWT_IN_BODY=true
      - USE_UNAUTHORIZED_STORAGE=true
    logging:
      driver: json-file
      options:
        max-size: "25m"
        max-file: "5"
    ports:
      - "6161:80"
    networks:
      - sync_in_network

  sync_in_desktop_releases:
    profiles: [ "releases" ]
    image: syncin/desktop-releases:2
    container_name: sync-in-desktop-releases
    user: "1026:100"
    volumes:
      - /volume1/docker/sync-in/desktop_releases:/releases:ro
    restart: "no"
    entrypoint: [ "/bin/true" ]
    networks:
      - sync_in_network

networks:
  sync_in_network:
    driver: bridge
This file orchestrates four distinct services that communicate over a private internal network named sync_in_network. The PUID 1026 and PGID 100 allow the main container to write data with the permissions of the NAS standard user (group 100 corresponding to the default users group in DSM).
I would also like to draw your attention to several important points:
- The Sync-in service will be exposed on port 6060 of the NAS (
"6060:8080"), so this will be the target for reverse proxy requests. - The OnlyOffice service will be exposed on port 6161 of the NAS (
"6161:80"), so this will be the target for reverse proxy requests. - The
INIT_ADMIN=truedirective creates the default account, namely thesync-inusername paired with thesync-inpassword, for the first login. - The MariaDB password must be specified, using the same value as in the
environment.yamlfile. - The OnlyOffice token must be specified (
secret-4), using the same value as in theenvironment.yamlfile.
Continue to the end and start the build of the project.
If you need more details about the options, consult the documentation:
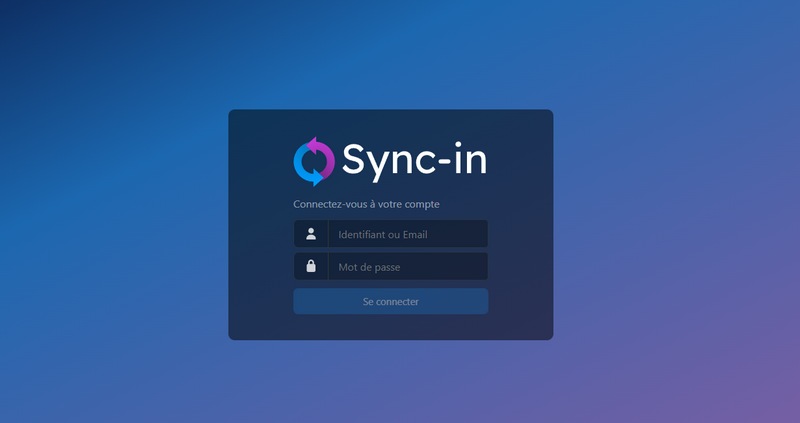
First login to Sync-in
From your browser, access the Sync-in interface by entering the domain name configured in the DSM reverse proxy. You should land on the login page. Log in with the sync-in / sync-in credentials, which I recommend changing immediately afterward.
Note: the first launch can take a long time, around 10 minutes. So if you run into difficulties, wait a moment and try accessing the Sync-in interface again.
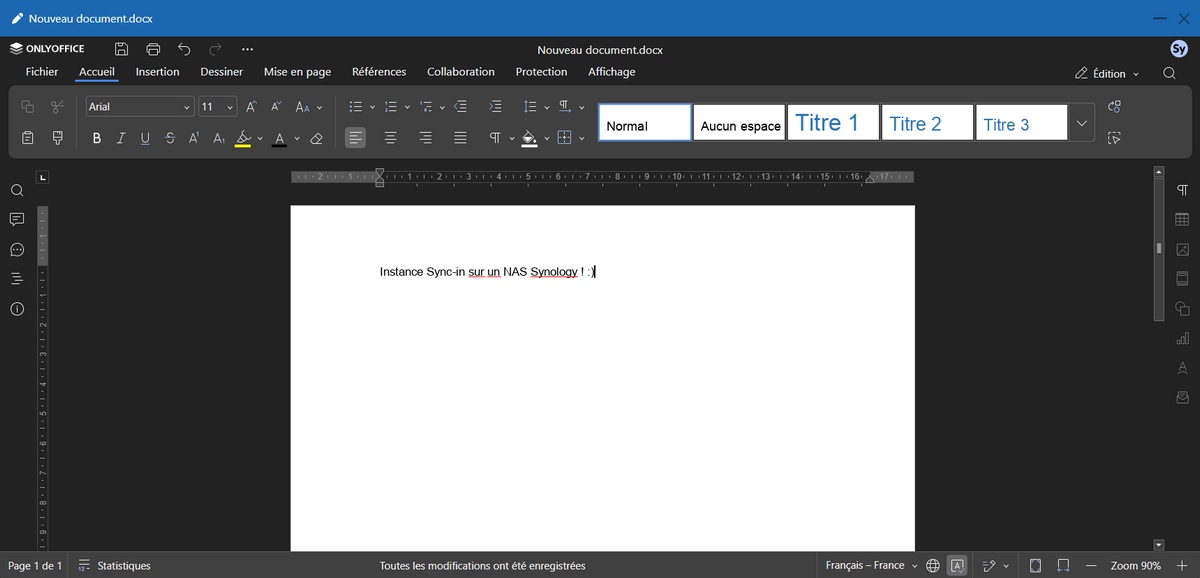
That’s it, you can now start using your Sync-in instance!

If you have errors or difficulty accessing the Sync-in interface, I encourage you to check the logs from the command line.
sudo docker compose logs -fConnect an existing folder
If you already have a folder on your NAS and want to associate it with your Sync-in instance, that is possible. In practice, you have two choices:
- Transfer the data from that folder into Sync-in, and Sync-in will organize the data in its local storage,
- Associate that existing folder as an external location (which lets you keep the existing structure)
You need to modify the docker-compose.yml file of the Sync-in stack. The example below maps the personal folder of the florian user to Sync-in.
    volumes:
      - /volume1/docker/sync-in/environment.yaml:/app/environment/environment.yaml
      - /volume1/docker/sync-in/data:/app/data:rw
      - /volume1/docker/sync-in/desktop_releases:/app/static/releases:ro
      - /volume1/homes/florian/:/home/florian/
When that is done, restart the containers.
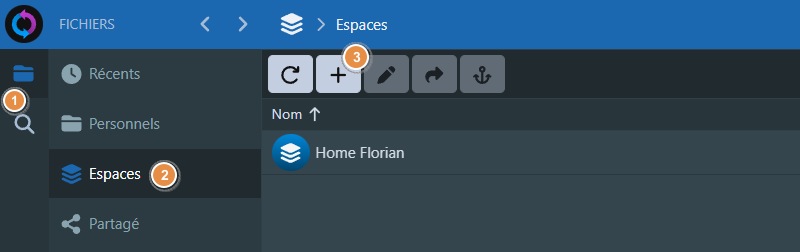
From the Sync-in interface, create a new space:
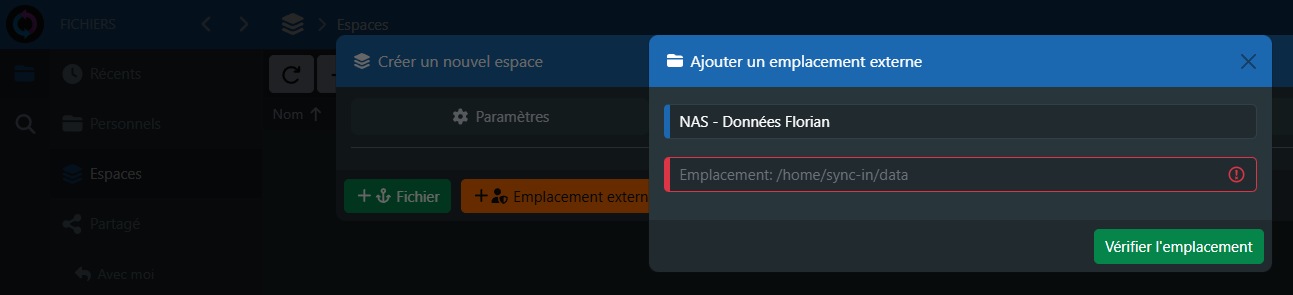
Complete the first tab, then switch to the Files tab to add an external location. Name this location, and above all, specify the associated path. You must enter the path to the directory where the NAS folder has been mapped (the right-hand value in the volume instruction).
In this case, it will be: /home/florian/.
The location appears correctly. Remember to assign permissions using the buttons on the right and manage access via the Members tab.
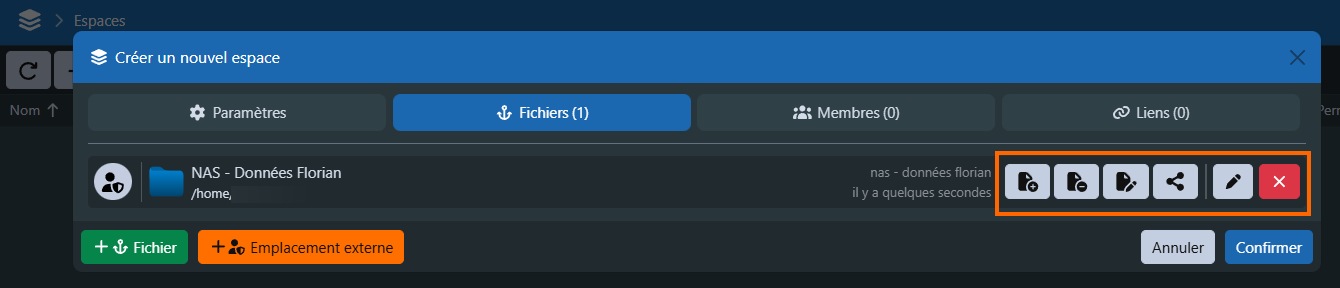
Validate. That’s it, you can now browse the data on your NAS through Sync-in. If you have the necessary permissions, you can also add files and modify existing ones.
All that remains is to install the synchronization client on your computer to go even further.
Conclusion
Installing Sync-in together with OnlyOffice (and/or Collabora Online) in a Synology NAS environment provides a complete solution for file sharing and collaborative work. The benefit is that you use an open source solution without being tied to Synology: tomorrow, you can choose to migrate your instance and its data to another platform without difficulty.