How do I configure Windows Server 2025 as a router with NAT?
Table of Contents
I. Introduction
This tutorial explains how to configure a Windows Server 2025 server as a router. But before you know how to do it, the question is: why use a Windows Server machine as a router?
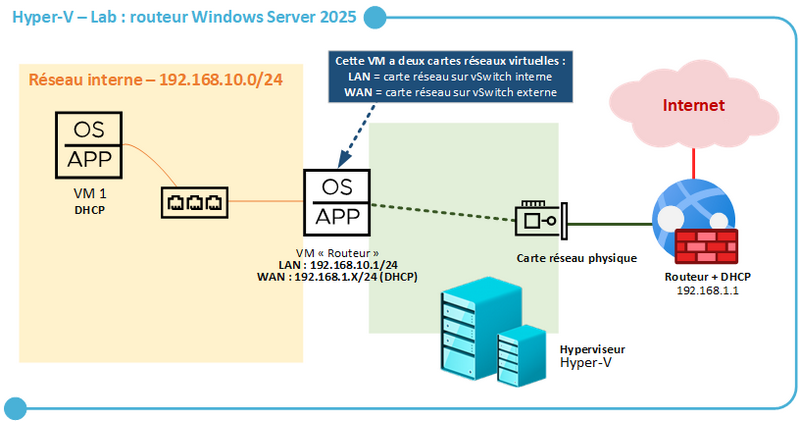
Let's start by answering the first question. Using a Windows Server machine as a router can prove useful in a virtualized lab: you can isolate virtual machines on an internal network, while providing Internet access via your router. The router then acts as a bridge between the internal and external networks, thanks to the presence of at least 2 network cards and a suitable configuration. I sometimes use this method in some of my labs. When this isn't the case, I use a virtual firewall running Pfsense or OPNsense.
Below is an example of how to implement this router on a Hyper-V hypervisor. It doesn't matter which virtualization platform you use, as the configuration shown is not just for Hyper-V.
Windows Server supports this functionality natively via its "Routing and Remote Access Service" (RRAS). This means it can be used as a router or VPN gateway (which we'll look at in a later article). On paper, there's nothing to stop you using Windows Server as a router in production, although personally, I've never seen it (unlike the VPN function that's used).
To follow this tutorial, you need :
- A machine running Windows Server 2025 or earlier
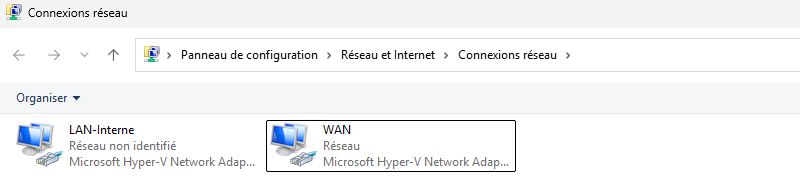
- Two network cards to interconnect networks (the internal virtual network and the physical LAN, for example)
- Administrator access to the server
- A good knowledge of NAT (because our configuration is based on NAT and we're going to set up port forwarding).
II. Installing the remote access role on Windows Server
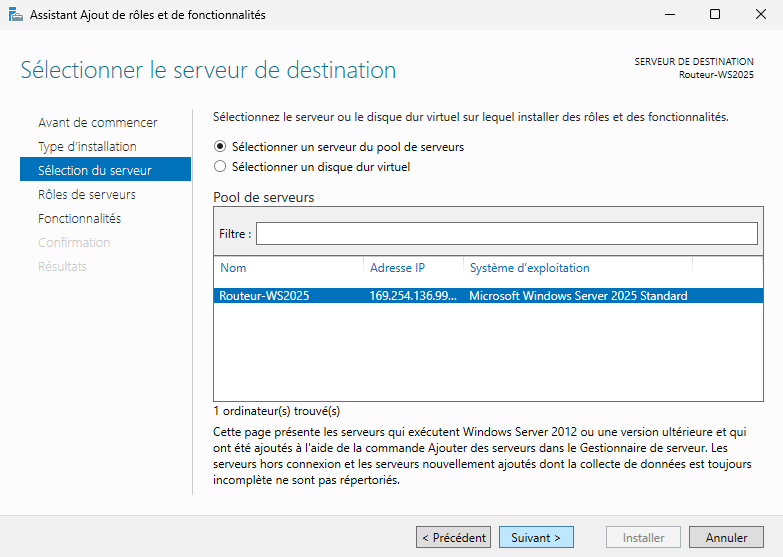
First, we need to install the "Remote Access" role (RRAS) on Windows Server. Open Server Manager and run the wizard to add a role or feature from the "Manage" menu. Go through the first steps...
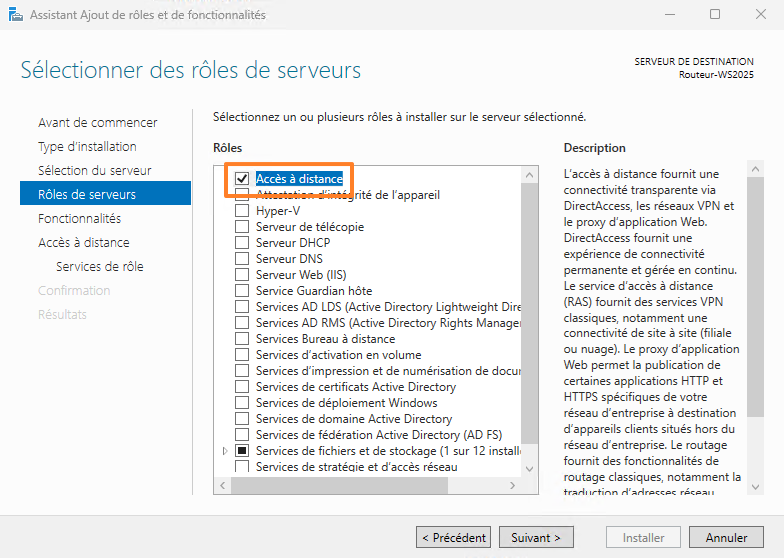
In the "Server roles" step, select the "Remote access" role.
Skip the step of adding features... Continue...
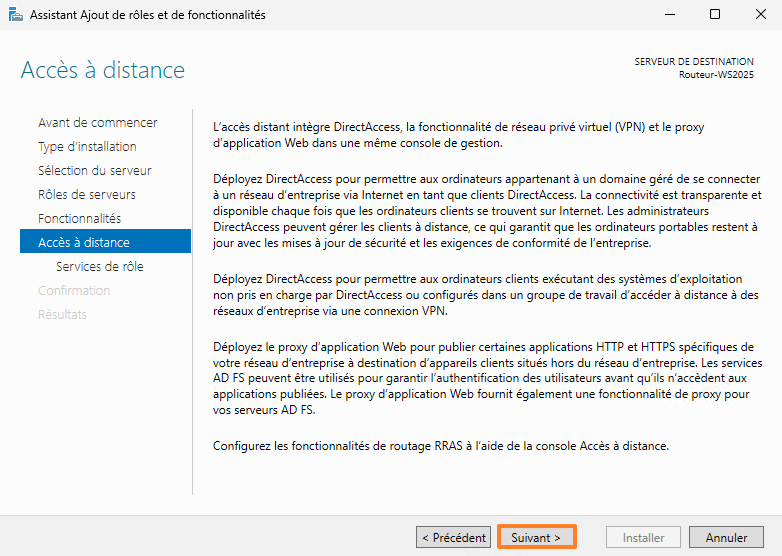
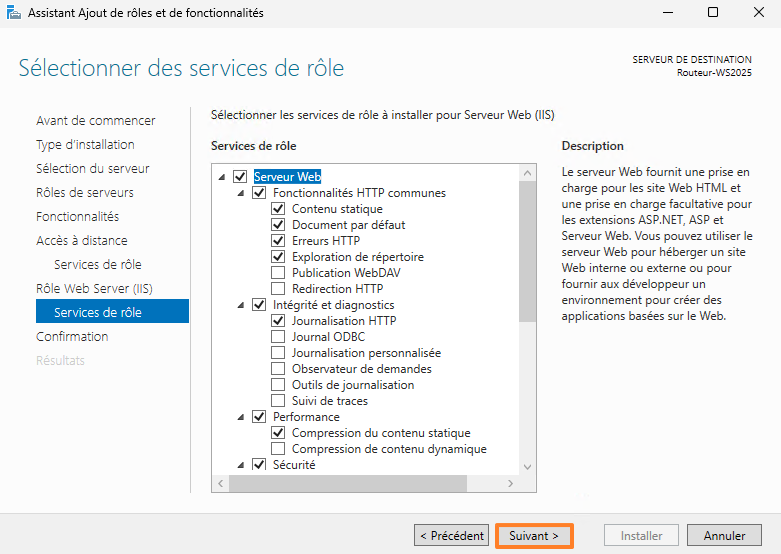
You must install the role service named "Routing" and accept the installation of the administration tools. In reality, this will also check and therefore install the "DirectAccess and VPN (remote access)" service, which we accept.

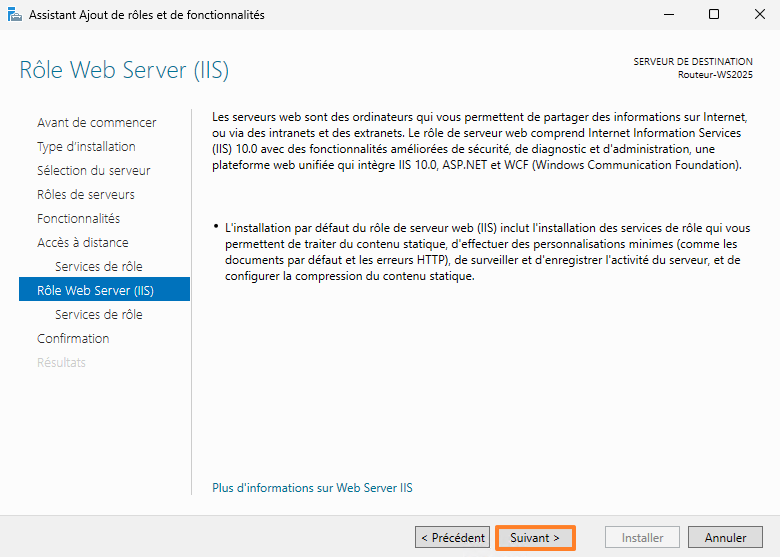
The IIS Web server will also be installed on the server (a direct consequence of the choices made above). After that, you can stop the IIS Web server on your router, as it is of no interest for today's purposes.
Continue with the default choices.
Start installation and wait a moment.
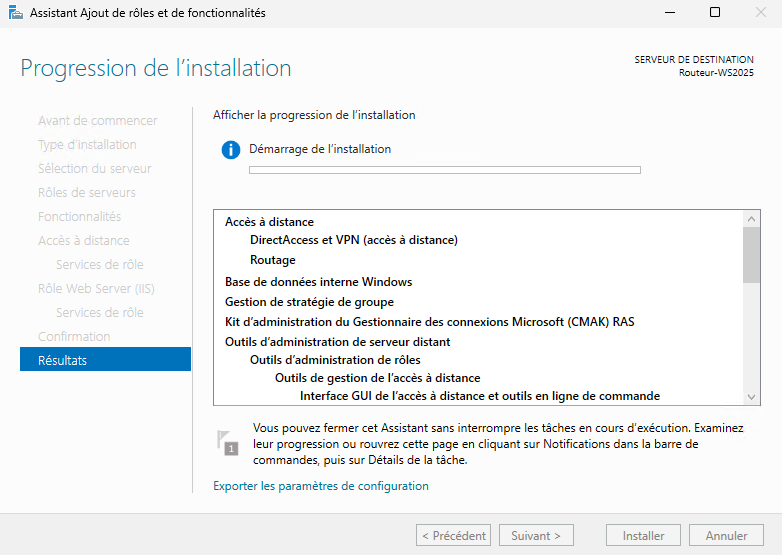
The first stage is now complete.
III. Routing configuration
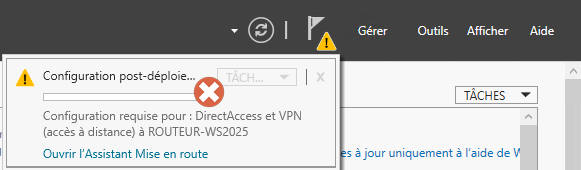
To continue setting up our router, we need to configure routing (and NAT). After installing the role, a warning appears in the Server Manager, prompting us to launch a configuration wizard. This is not useful in our case, so you can ignore it.
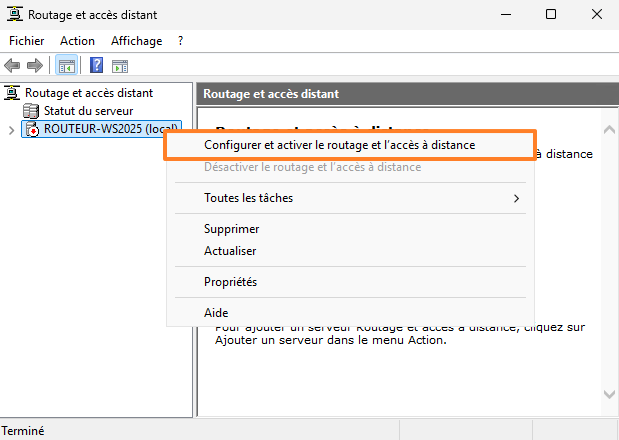
On the other hand, from the "Tools" menu, you need to open the "Routing and remote access" console. Right-click on the server name, then click on "Configure and enable routing and remote access".
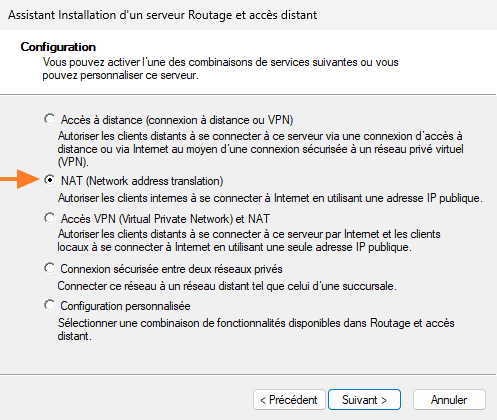
A new wizard is launched. Skip the first step. Next, select the configuration template named "NAT (Network Address Translation)", unless you don't want to use NAT. In that case, you could opt for the custom configuration.
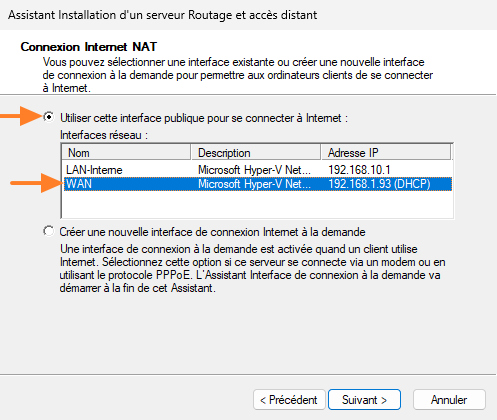
Next, the wizard asks you to select the network interface connected to the Internet. Select "WAN" and continue.
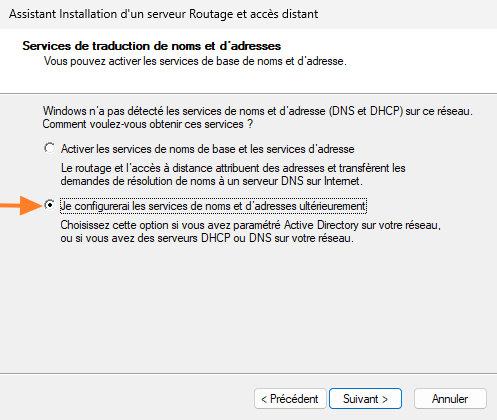
The next step alerts you to the fact that DNS and DHCP services have not been detected on the local machine. Installing these two optional roles is possible, but remains optional. If you're setting up an Active Directory environment, chances are that the DNS server is already hosted by the domain controller server. For this reason, it's best to select the "I'll configure the name and address services later" option.
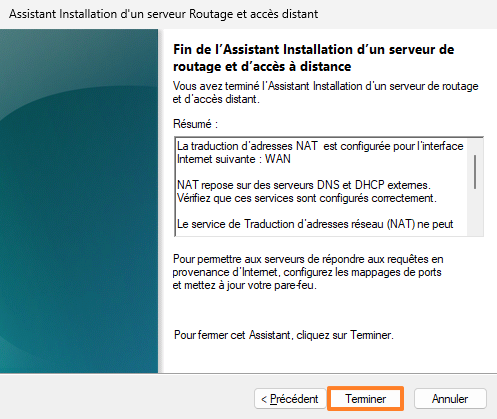
Finally, click on "Finish" to confirm the configuration. An error will certainly appear: "The Remote Access Service (RAS) cannot activate routing and remote access for the following probable reason: ports cannot be opened...". Simply click on "OK", this will have no impact on the rest of the process.
Services should start up and your server should display a nice green icon, as shown in the image below.
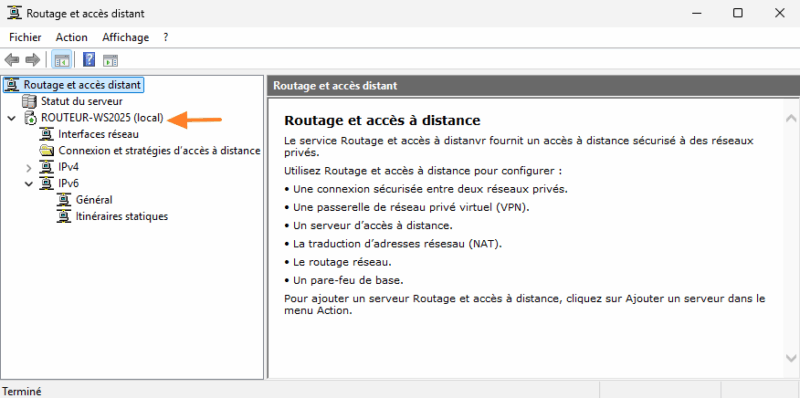
The router is now ready for use! The best way to verify this is to test.
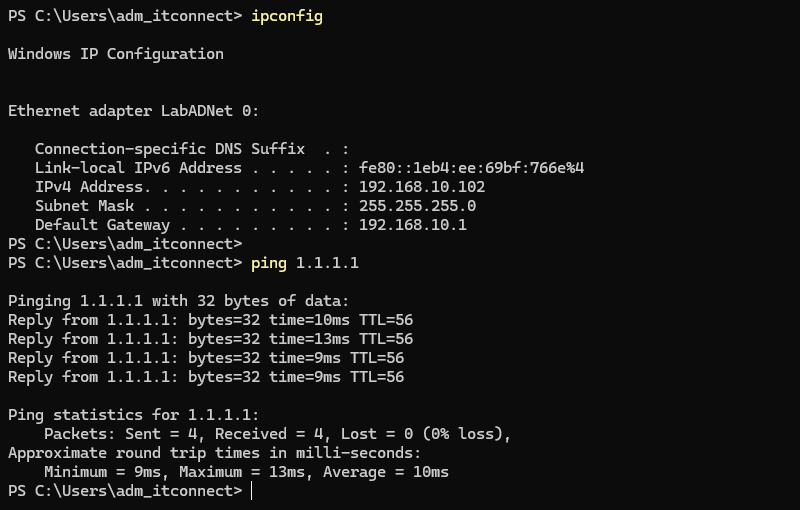
From a machine connected directly to the internal LAN, which has a fixed IP address, a ping to an external IP address works just fine! If you wish, you can install a DHCP server on Windows Server, on the same machine as the router.
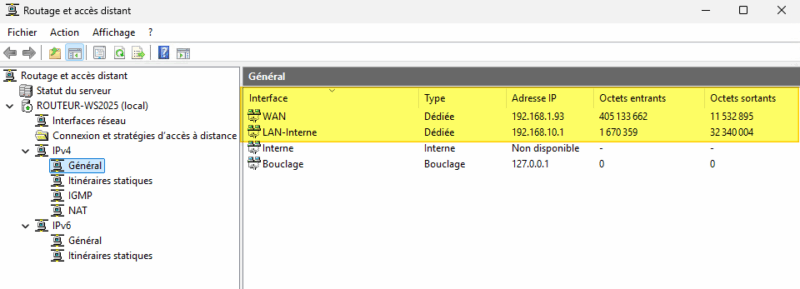
From the remote access interface, if you click on "IPv4", then on "General", you can view the incoming and outgoing traffic counters for both router interfaces. This is a sign of activity.
Initial router configuration under Windows Server is now complete! In the rest of this article, we'll look at some additional configuration options.
IV. Going further with the Windows Server router
A. Create a port forwarding rule
Let's take the following example:
- You have virtual machines connected to your internal LAN, isolated from the physical LAN. They access the Internet via the router (and the NAT mechanism).
- You have a workstation connected to the physical LAN (on the same side as the router's WAN interface): how can it access virtual machines directly?
The answer: port forwarding to map an external port to an internal port. Here, we'll enable RDP access to a virtual machine located on the internal LAN.
Here are the steps to follow.
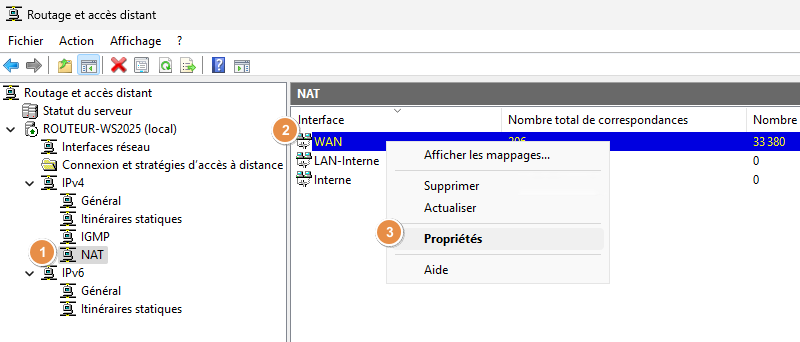
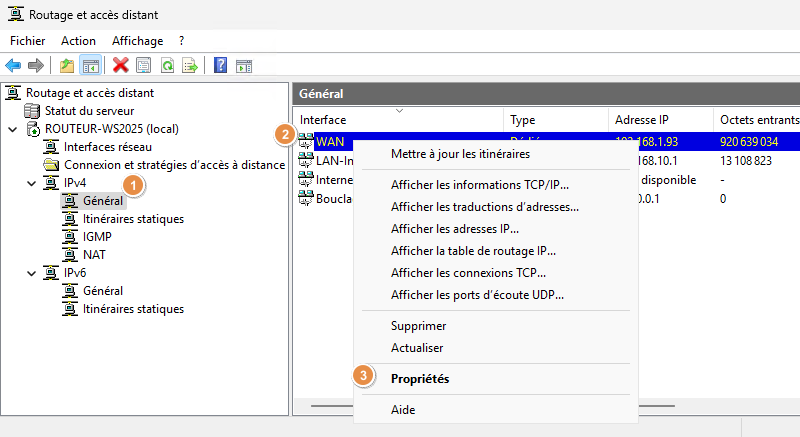
1 - To begin configuration, click on "NAT" under "IPv4", still from the routing management console.
2 - Right-click on "WAN", as this is the router's external interface.
3 - Click on "Properties".
Then carry out the following steps:
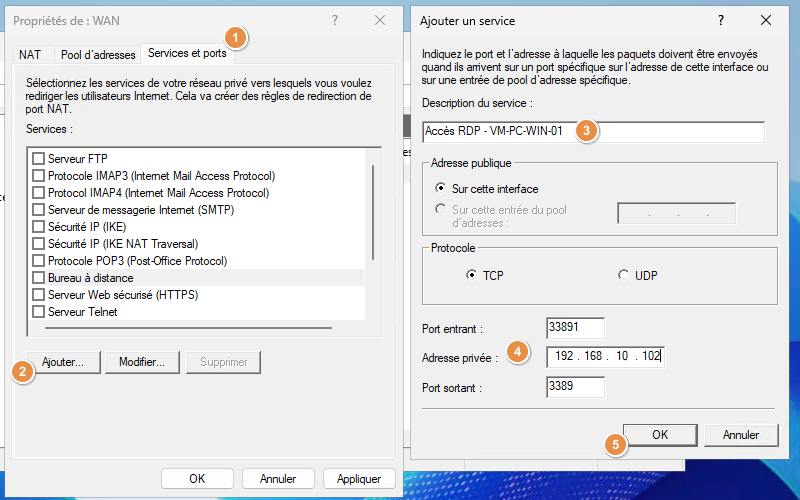
1 - Click on the "Services and ports" tab.
2 - Click on the "Add" button to create a new rule from scratch. Note: if you want to redirect a single VM from port 3389 (external) to port 3389 (internal), corresponding to RDP, edit the "Remote Desktop" rule directly. You can't create 2 rules with the same incoming port (external), so it will return an error if you create a new rule with port 3389.
Here, the aim will be to connect to port "33891" on the router's WAN IP address in order to be redirected to port "3389" on the VM with IP address "192.168.10.102".
3 - Name this rule.
4 - Configure the rule. Note that the incoming port corresponds to the port on the router's WAN interface, while the outgoing port must correspond to the port on which the service listens on the destination machine.
5 - Confirm with the "OK" button.
Here is an example:
Note: if you need to connect to another VM via RDP, you can choose another incoming port, e.g. "33892", while keeping the outgoing port "3389".
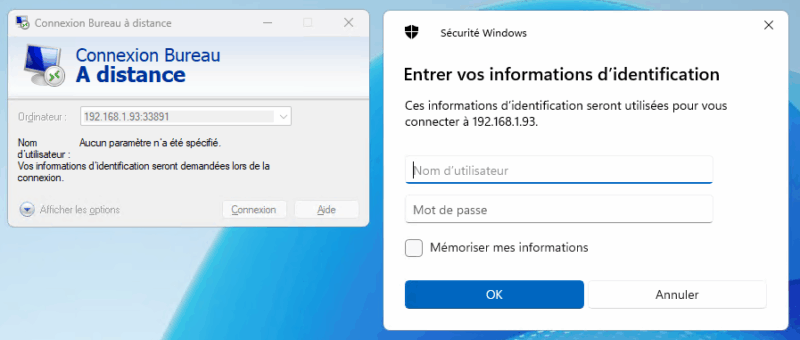
Finally, thanks to this rule, I can connect to the virtual machine from a remote machine. To do so, I need to specify the IP address of the router's WAN interface, as well as the port number. For me, this will be 192.168.1.93:33891. The flow will be redirected to 192.168.10.102:3389.
B. Filter output flows
Finally, let's take a look at another configuration option: outbound flow filtering. This allows your router to prevent certain outgoing flows from being authorized. For example, you could create a rule to block outgoing connections to port 80 (HTTP).
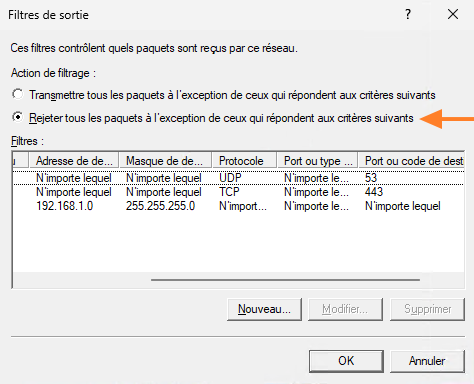
Here, we'll make sure to refuse all outgoing traffic, except what is explicitly authorized by a rule. We will only allow the following flows:
- Outgoing flows to all networks, on ports 443 (HTTPS) and 53 (DNS).
- Outgoing flows to the physical LAN (192.168.1.0/24), on port 3389 (RDP), so as not to block Remote Desktop connections to VMs.
Click on "IPv4", on "General", then right-click on "WAN" to access the interface properties.
A new window will open. Click on the "Output filters" button, then add a new rule via the "New" button. Configure your first rule. To authorize outgoing DNS flows, simply choose the "UDP" protocol and specify "53" as the destination port number.
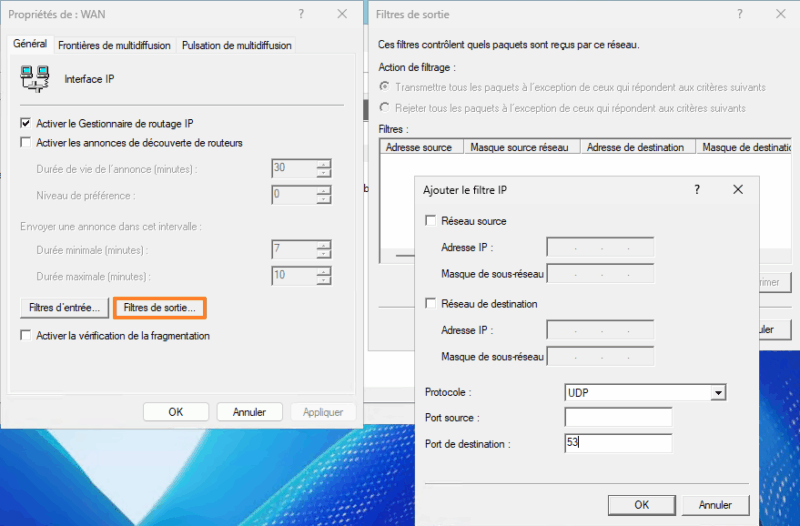
Repeat for the other two rules. The rule for port 443/TCP (HTTPS) is based on the same principle. For the third rule, you need to restrict the destination address by specifying the network address of the physical local network. This will limit authorization to what is strictly necessary.
Finally, select the filter action "Reject all packets except those meeting the following criteria".
Confirm with the "OK" button, twice. Your filter rules are now effective. Now all you have to do is test them!
V. Conclusion
In the end, by rigorously applying this procedure, you should be able to set up a router on Windows Server! If you want to go further, you'll also know how to create port forwarding and egress filtering rules. These are two essential features for fine-tuning router configuration.