Code editors for PowerShell
Table of Contents
I. Introduction
To write PowerShell scripts properly, we need a suitable application that could be called an "Integrated Scripting Environment" or a code editor. Since a PowerShell script is a text file with the ".ps1" extension, you can read and edit it with any application that acts as a text editor, including Notepad, as you saw earlier.
However, this is not suitable for a number of reasons, including the following:
- This application is unable to execute the
- Syntactic coloring is absent
- Command autocompletion is missing
In other words, while it's possible to write a PowerShell script with Notepad or equivalent, it's not "comfortable". To execute commands, write, test and debug scripts, you need to use an application such as Windows PowerShell ISE and Visual Studio Code. Both are free applications developed by Microsoft.
This chapter will introduce you to these two applications, enabling you to write scripts in the best possible conditions.
II. Getting started with Windows PowerShell ISE
Let's start with Windows PowerShell ISE (Integrated Scripting Environment), launched by Microsoft at the same time as PowerShell 2.0. Since Windows 7, it's beenan integrated Windows application, alongside Windows PowerShell. You can use it on Windows and Windows Server, and it's identical. The application is not available for other operating systems.
Although Windows PowerShell ISE has now been overtaken by Visual Studio Code, which we'll be looking at in a moment, it's still very interesting because it's easy to learn, and as I mentioned earlier, it's native to Windows. So, if you need to write, modify or debug a script quickly on a server, you can use it without installing any additional applications.
Before you start exploring Windows PowerShell ISE, please note that this code editor supports all versions of PowerShell up to version 5.1. This means that it does not officially support PowerShell 6, nor PowerShell 7. This will also be true for future versions of PowerShell.
A. Starting Windows PowerShell ISE for the first time
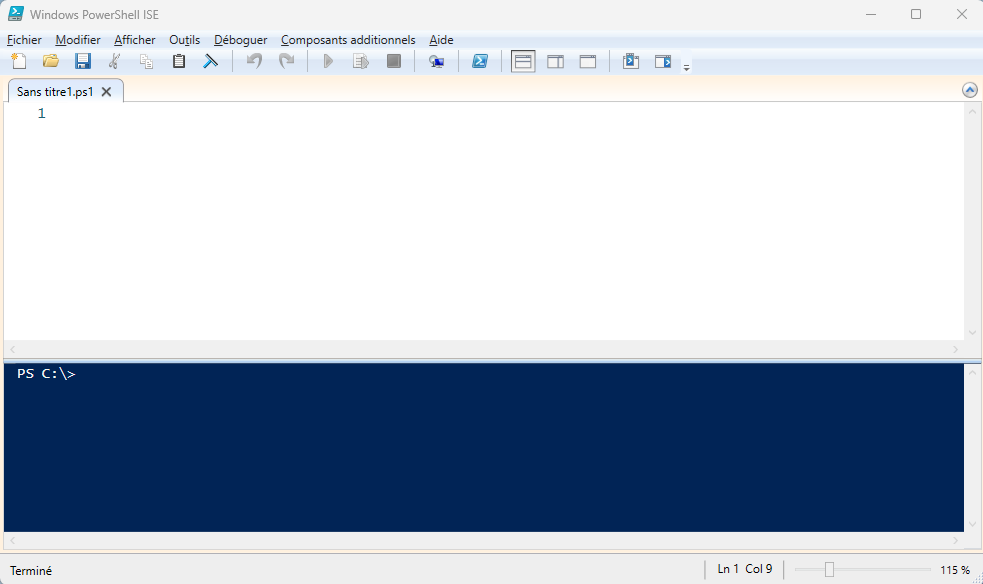
To start Windows PowerShell ISE, simply search for"ISE" on your system using the Start menu. It's available in 32-bit and 64-bit versions, and is installed here:
%windir%\system32\WindowsPowerShell\v1.0\PowerShell_ISE.exeThe ISE interface is now ready for you:
B. Discovering the PowerShell ISE interface
This application offers the possibility of editing several scripts simultaneously, thanks to a tabbed navigation system based on the same principle used by web browsers. The application's interface is divided into three main areas:
- The upper part with the menu and a set of buttons
- The central part, which corresponds to the script content
- The lower part is an interactive Windows PowerShell console. It offers the possibility of executing commands, but is also used to display the results of script execution.
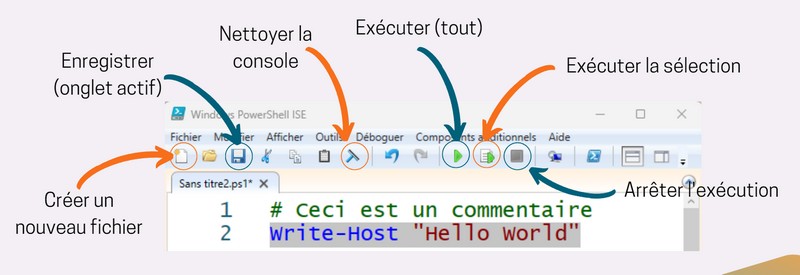
To get to grips with Windows PowerShell ISE, you need to know at least what these buttons are for:
C. Execute lines of code
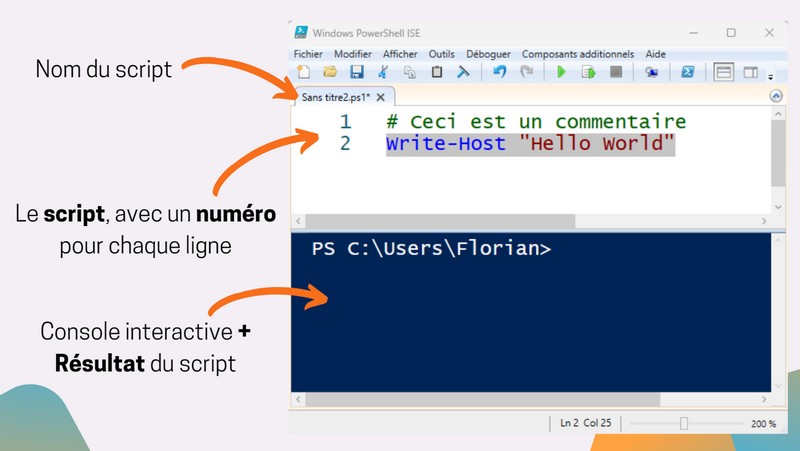
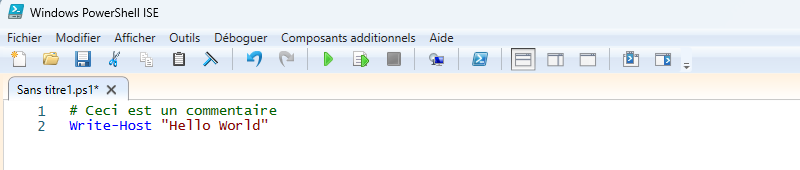
In the Windows PowerShell ISE editor, add these two lines in the area dedicated to script writing:
# This is a comment
Write-Host "Hello World"
The result is similar to the one below. We can see that each line is numbered and that syntax highlighting is included. Visually, it's appreciable.
Now you're going to execute this piece of code, which consists of two lines. Line number 1 is a comment and line number 2 is used to display text in the console.
1 - Click on the"Play" button to run the script, or press the F5 key on your keyboard.
2 - The executed code is displayed in the PowerShell console.
3 - The result of the execution is also displayed in the PowerShell console.
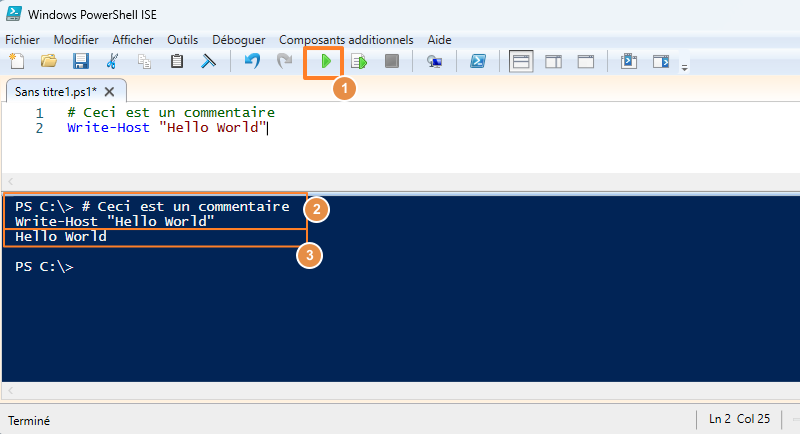
Congratulations! You've just run your first lines of PowerShell code with Windows PowerShell ISE.
We're now going to take a look at how to get started with Visual Studio Code.
Note : Microsoft continues to support Windows PowerShell ISE, but this application is no longer in Microsoft's plans. However, it will not be removed from the operating system(it is not in the current plans), which is reassuring.
III. Getting started with Visual Studio Code
For the rest of this chapter, you'll be putting Windows PowerShell ISE to one side in favor of Visual Studio Code, usually referred to as VSCode.
Compatible with Windows, macOS and Linux, in just a few years Visual Studio Code has become a must-have application for editing code. It's completely free, open source and supports numerous languages, including PowerShell. It also has the advantage of supporting Git as a versioning system. Here are some of the differences and additional features compared with the Windows PowerShell ISE application.
Continuing with this game of differences between the two applications, VSCode supports both Windows PowerShell and PowerShell.
For further information, please visit the official website:
Note : Visual Studio Code should not be confused with Visual Studio, which is a much heavier development suite (IDE) aimed directly at application developers. Although Visual Studio can be used to write PowerShell code, it is preferable to use VSCode.
A. Installing Visual Studio Code on Windows
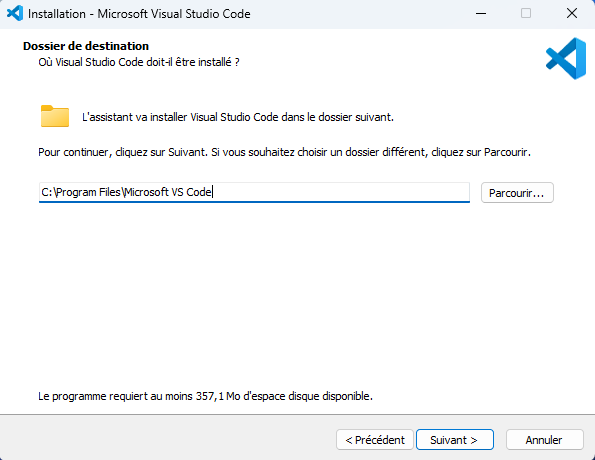
Start by installing Visual Studio Code on your machine. You can find it on the official website. For Windows, you can choose between machine-level installation for all users, or installation only in your profile.
Installation takes just a few clicks. Let the wizard guide you.
B. Starting Visual Studio Code for the first time
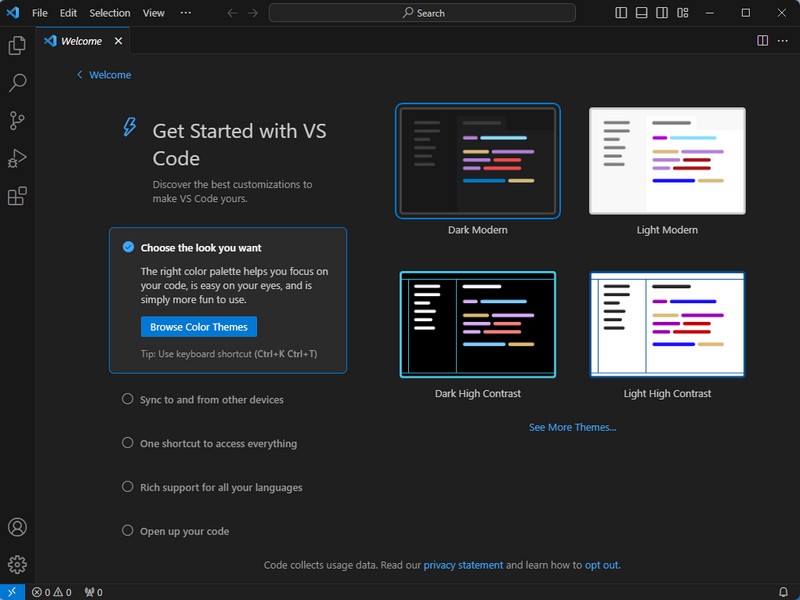
Open Visual Studio Code on your computer. On first launch, a welcome assistant is there to greet you and guide you through your first steps with the application. The first step is to define a theme.
You can also synchronize VSCode with your Microsoft account, so you can use the same settings on all your devices. In addition, GitHub synchronization lets you sync your scripts with your repository. As we can see, there's a high level of integration with other Microsoft services.
Installation and initial start-up are now complete.
C. Add the PowerShell extension to Visual Studio Code
By default, Visual Studio Code can edit text files, but it's not ready to help you edit PowerShell code. VSCode is based on a system of extensions: each extension adds new functionalities to Visual Studio Code. For example, there is an extension for every language supported by this code editor.
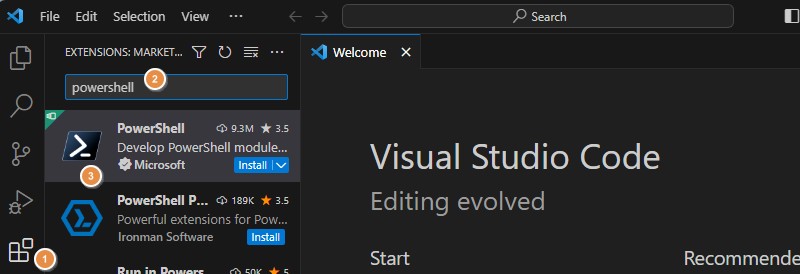
Click on theextensions icon on the left (1), search for"powershell" (2) and click on the"PowerShell" extension proposed by Microsoft (3).
Note : if you're looking for a complete environment with PowerShell and other useful extensions (GitHub integration, YAML support, Markdown support, a color picker, etc.), take a look at Justin Grote's"PowerShell Extension Pack". It includes 32 extensions. You can also browse the list of extensions in this collection: it may give you some ideas!
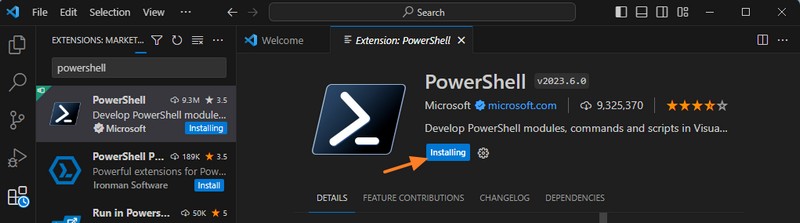
Click on the"Install" button and wait a few seconds. Visual Studio Code adds the PowerShell extension to your machine.
Note : you can also install the extension by typing the command"ext install powershell" after using the shortcut CTRL + P.
Extensions are installed in the user's profile. This is the directory used on each system:
- Windows : %USERPROFILE%.vscodeextensions.
- macOS : ~/.vscode/extensions.
- Linux : ~/.vscode/extensions.
Once the extension is installed, VSCode is ready to edit PowerShell code!
D. Configuring VSCode for PowerShell
Before creating a script, we will modify two options in the VSCode parameters in order to :
- Set PowerShell as default language
- Enable use of the TAB key for command autocompletion
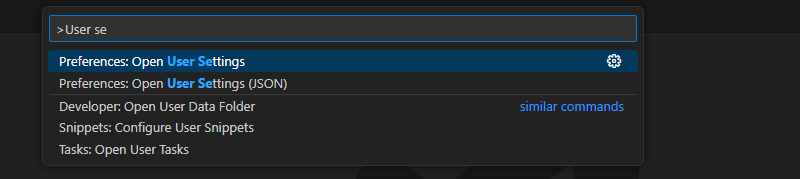
To access the command entry area, use the shortcut"F1" or"CTRL + SHIFT + P". This is a great way toperform actions in VSCode without having to browse menus.
Here, search for"User settings" and click on"Preferences: Open User Settings". Your preferences are personal and saved in your session.
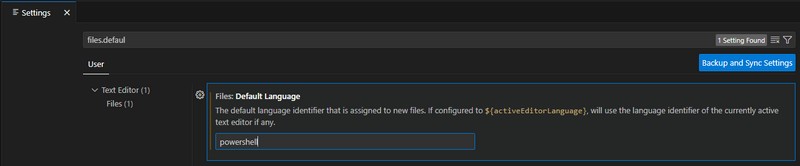
Once on the settings page, search for"files.default" and change the"Files: Default Language" parameter to"powershell". Like this:
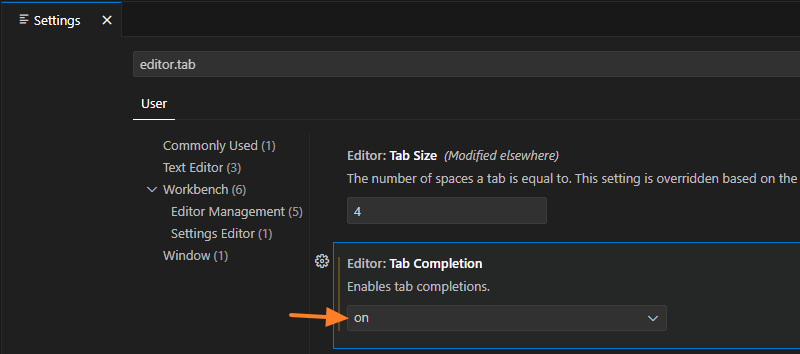
When this is done, search for the second parameter via the keyword"editor.tab" and switch the parameter named"Editor: Tab Completion" to"on". Note that VSCode benefits fromIntelliSense (like PowerShell ISE), which is a great help when coding.
There are many other parameters available that can be used to personalize your environment. Let's get started with these two options.
E. First PowerShell script with VSCode
In Visual Studio Code, there are several ways to create a new file. Quite simply, you can click on the"File" menu and then"New File", but the quickest way is to use the shortcut"CTRL + N" to create a new file in PowerShell format (since this is the default language defined in the parameters).
- All our PowerShell tutorials

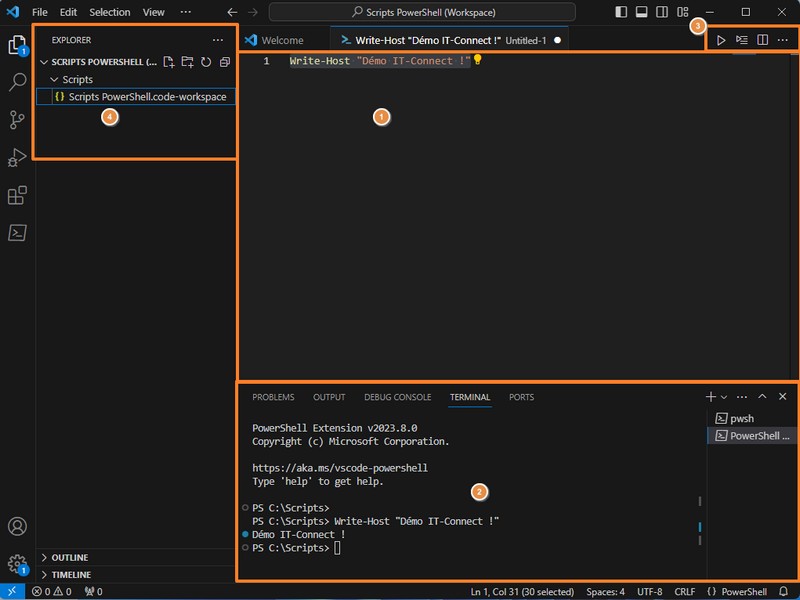
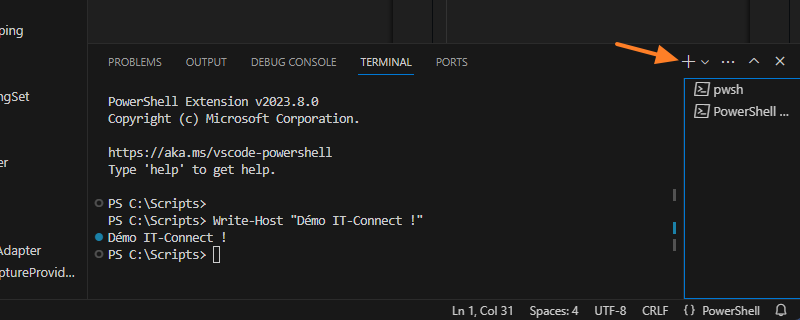
A new file opens in a dedicated tab. Without going into detail, here's some information on the organization of the VSCode interface:
1 - This is where you write your PowerShell script (or any other language), in the code editor.
2 - Terminal area. This is where you can view the results of your script, or enter commands directly.
3 - Area with action buttons. The first button is used to execute the entire script, the second to execute the selection, while the third button divides the code editor into two areas, giving you two scripts side by side.
4 - Explorer zone, where you can display the contents of a directory on your PC (a directory where you store your scripts, for example). This directory will be associated with a workspace which will have its own configuration. You can create several workspaces (see the official documentation on this subject).
Now all you have to do is code! Remember to save your script.
Note : once the folder containing your scripts has been saved as a workspace(File > Save workspace as), you can benefit from automatic code formatting (indentation) using the following shortcut: Shift + Alt + F. This will format your code in the blink of an eye!
F. ISE mode in VSCode
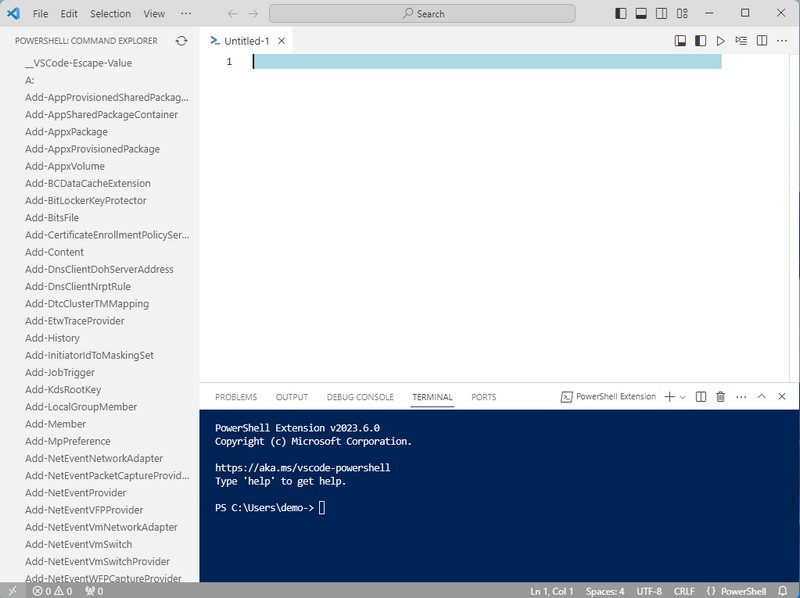
If you're just starting out with PowerShell ISE and are making the transition to Visual Studio Code at a later date, you should be aware that this application includes a mode called "ISE Mode".
To activate it, call the VSCode command prompt via F1 and enter "ISE Mode", then click on "PowerShell: Enable ISE Mode". To disable this mode, repeat the operation to select "PowerShell: Disable ISE Mode".
Here's an overview:
G. Switching between PowerShell and Windows PowerShell
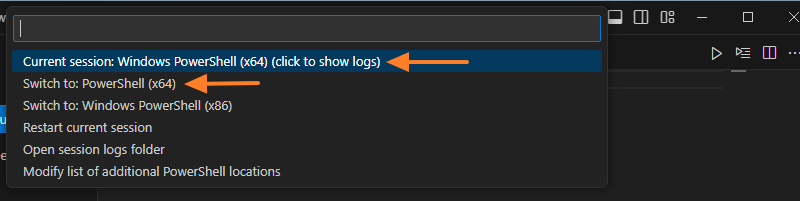
Visual Studio Code can use both Windows PowerShell and PowerShell, unlike PowerShell ISE, which can only use Windows PowerShell. How do I switch from one version of PowerShell to another in VSCode?
Click on the "{}" button in the bottom right-hand corner to open the "Show PowerShell Session Menu".
In the menu that appears, choose "Windows PowerShell" or "PowerShell", depending on the version you wish to use.
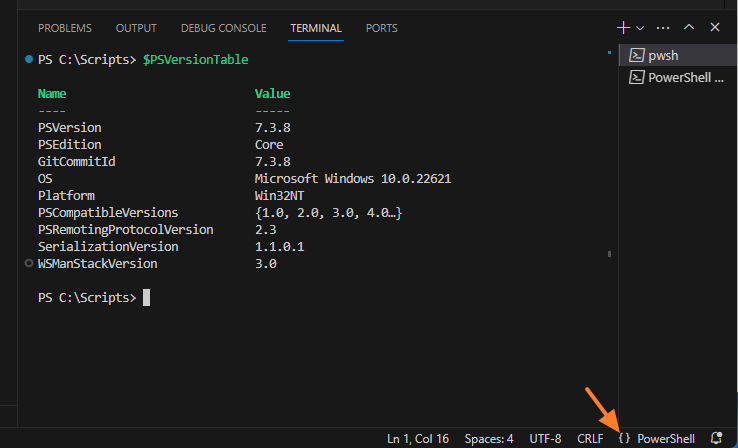
You can open several PowerShell "Terminals" simultaneously and choose the version you want for each of them. This way, you can easily switch from one to the other by clicking on it in the list!
IV. Conclusion
After reading this chapter, you'll be able to handle both Windows PowerShell ISE and Visual Studio Code. Let's say you know the basics of both tools.
In addition to these two applications, there are others, notably PowerShell Studio, which has the advantage of integrating functions dedicated to the creation of graphical interfaces with PowerShell. This is a paying application published by SAPIEN Technologies.